I have found that with the arrival of the epoxy, I have been liberated to start doing things that really feel like progress.
 |
| A couple of hunks of wood, glued together to form a blank from which the noseblock will be formed. |
PocketShip has a keel that runs about 2/3 of her length. This keel is is essentially a hollow box made up of plywood sides and timber on the top and bottom. The centerboard trunk runs through it, and a fair bit of the hollow space will be filled with the lead that helps make up PocketShip's ballast. The the bow end of the keel is a noseblock made of timber, in my case, fir. I didn't have a hunk of wood the right size for the blank for the noseblock, so I had to laminate one together.
I mentioned earlier the rabbet cut into the centerboard that's to be filled with thickened epoxy that will be exposed when the centerboard is shaped to form an "armored" leading and trailing edge. Since I knew I was entering a phase where I'd be making a bunch of thickened epoxy for various tasks, I set up the centerboard so that I could pour the leftovers from any given batch of epoxy into the rabbet. It filled up pretty quickly.
 |
| Thickened epoxy poured into the rabbet in the centerboard |
Since first reading the manual and looking over the plans, I knew that assembling the rudder would be one of the earliest things I'd work on. So, I glued down the timber blocking that I had earlier cut out and shaped to one of the plywood rudder skins. The next night I went out and glued on the other skin.
 |
| The rudder blocking glued to one of the rudder skins |
 |
| The rudder takes shape |
While I was gluing timber to the rudder, I also assembled the centerboard trunk.
 |
| Here, the blocking has been glued to on side of the centerboard trunk. |
 |
| The centerboard trunk. |
Feeling ambitious, I went for broke and scarfed together the plywood for the hull panels. I was going to cut the scarfs the old fashioned way, with a hand plane. But, I chickened out and decided to cut them using a circular saw and jig as I had seen on Dave Curtis' PocketShip blog
http://pocketshipadventure.blogspot.com/. It turned out OK. Later, when I cut the scarfs for the keelson, I chose to do so with the hand plane and discovered that that actually turned out better. Go figure.
 |
| Scarfing together the plywood panels that will make up the bilge, side, and topside panels. |
After all of these adventures, I turned my attention back to the rudder. The sides of the tiller slot are reinforced with 3/4" "cheeks." I bonded those on, and also attached the rudder endplate. I have mixed feelings about this endplate...basically a winglet on the rudder. Aerodynamically (or hydrodynamically in this case), adding a winglet has essentially the same effect on a lifting surface as adding the same thing in span. Since the rudder has to lift in both directions, it basically means that you get the benefit of more rudder area, but with twice the wetted area and thus twice the drag of just making the rudder longer. Of course, the reason that winglets get added to airplanes instead of just increasing the span, is that some airplanes have span constraints (ok, some airplane have winglets because they've sexy, but that's nuts). For me, that's what sold the endplate on the rudder for me. Since PocketShip will be trailered, there is essentially a length-constraint on the rudder...a longer rudder would have to be removed before hauling the boat up on to the trailer. I am thinking about doing a Mk.2 "long" rudder down the road...I could use it whenever I wanted to put the boat into racing mode. :-)
Speaking of rudders, I had a crazy idea the other night. I could add a seal between the rudder and the aft end of the keel. This would greatly increase the power of the rudder and would reduce drag. I haven't thought through how to execute this yet, but the idea is alluring.
 |
| The assembled rudder. This picture was taken before I added the fillets between the rudder and endplate. |
After all that dried I added two large epoxy fillets between the rudder and endplate. Now I just need to sand down any rough spots on the rudder and fiberglass the sides and endplate...the cheeks won't need it.
Returning to the keel assembly, I set about shaping the noseblock. Step 1 was to cut out 1/4" rabbets on either side of the aft end of the noseblock to receive the plywood sides of the keel. Step 1 didn't go so well. Somehow, I miscut the rabbets. Twice. I ruined my blank, so I had to laminate up a new one. I'll have another go at the noseblock in the near future.
 |
| Getting ready to cut the noseblock. Little did I know I was about to make a mistake and ruin this piece. |
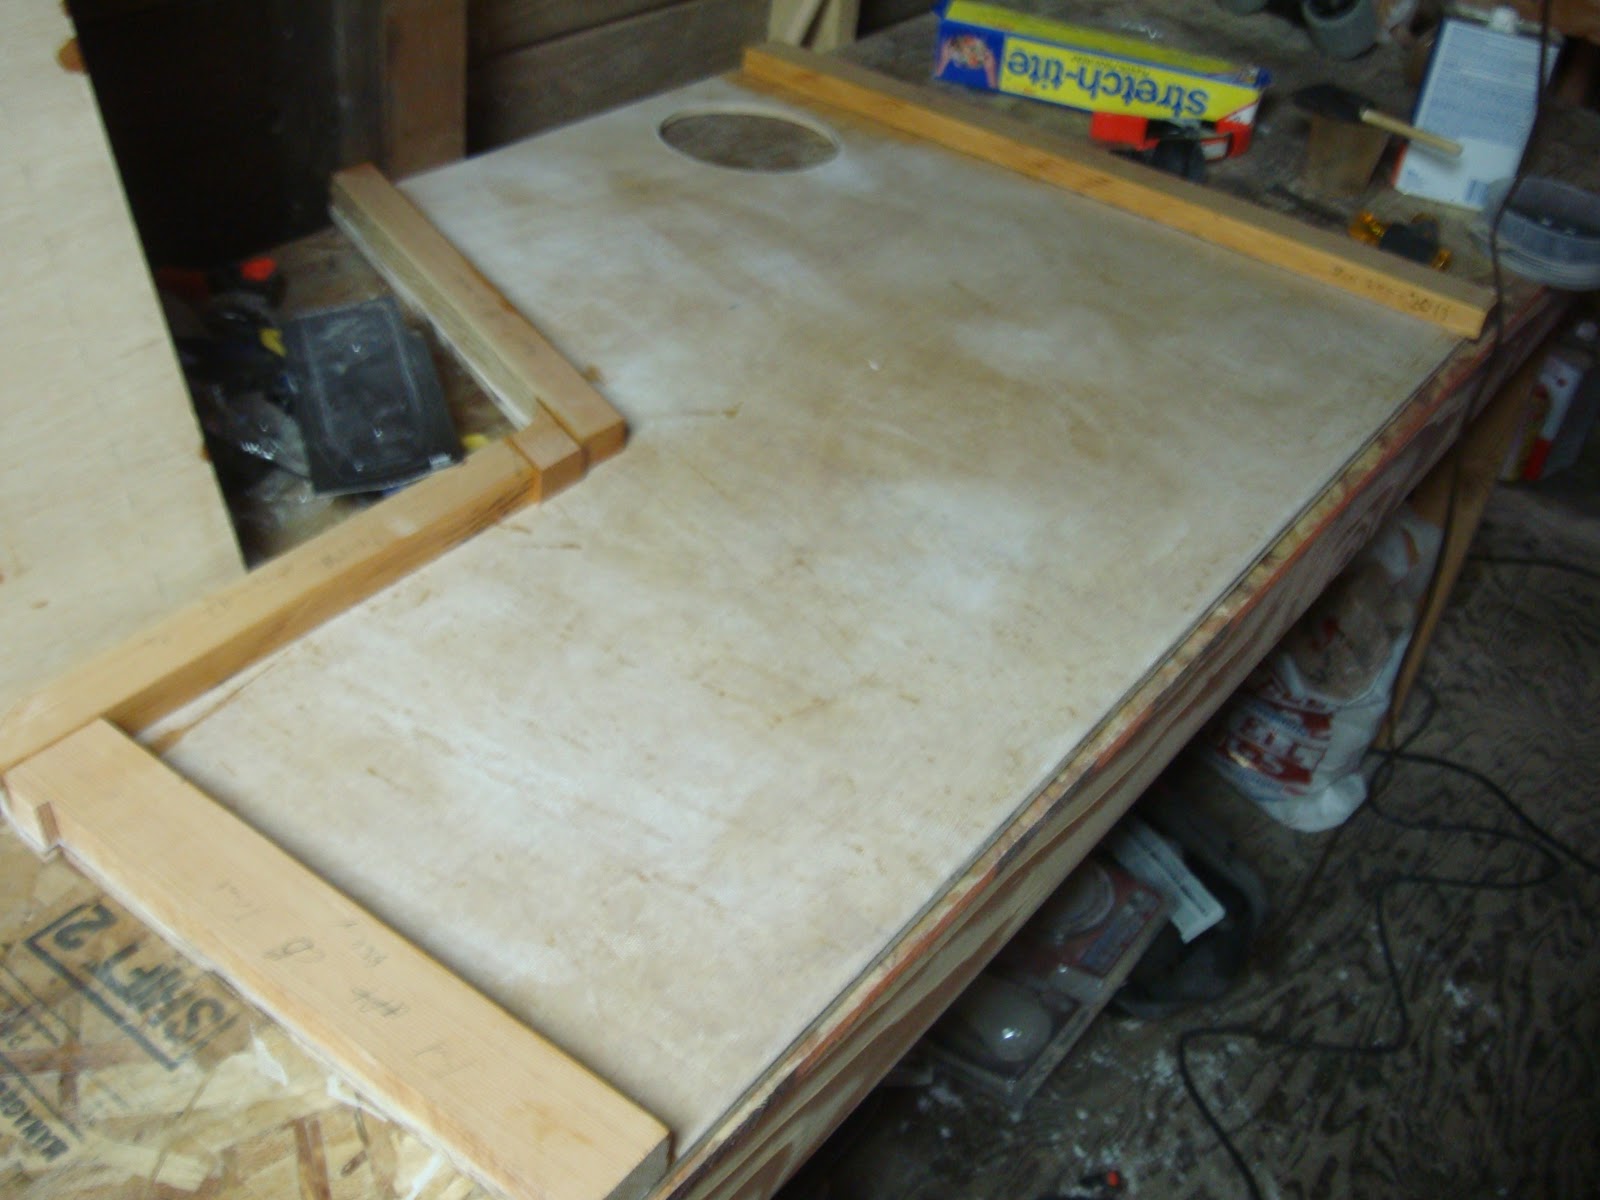
In the meantime, I decided it was ok to assemble one side of the keel. After shaping the few pieces of timber that forms the blocking, I puckied everything up, clamped it down and called it a day.
 |
| Here I'm test fitting the aft keel blocking |
 |
| The aft keel blocking, glued and clamped to the port keel side. |
 |
| The centerboard trunk glued to the port keel side. |
I definitely feel like things are moving forward, although I don't think that it has mentally registered that all of these bits and pieces and sub-assemblies will be coming together to form a real boat.


No comments:
Post a Comment