Showing posts with label Sailboat. Show all posts

Saturday, July 23, 2022

A Project Named Clancy - Finale

It floats! 

Only the lightest of airs were present for the maiden voyage, but even that sufficed to move Clancy through the water.  The boat was stable and well balanced with some slight weather helm.  There's a joy to sailing a yar lil' dinghy, even if ghosting about.

Rich Kolin and Bob Pickett set out to enable amateurs to build a fun and capable sailing dinghy in their garages and boat that was "the most sailboat you can squeeze out of a 10-sheet of plywood."  How did reality stack up against Pickett's claims?  Constructing the boat was indeed straight-forward and something a first time builder could easily contemplate.  Of course, the technology of amateur built boats has advanced massively since the Clancy came out.  Kits and plans have become more complete and even easier to build, and the hull forms that now grace plywood boats can carry so much shape as to defy the medium.  Still, Clancy is a purposeful little boat that fulfils its purpose admirably.  


Saturday, May 7, 2022

Edensaw Boat Building Challenge 2019: Building A CLC Jimmy Skiff 2


It took about a week following the 2019 Wooden Boat Festival before I felt fully recovered from it.  As our team learned in our 2018 attempt, it can be tiring to build a high-quality boat over the course of two and a half days.  Yet in 2019, we took up our tools again to participate in the Edensaw Boat Building Challenge at the Wooden Boat Festival in Port Townsend. 

In selecting a boat to build, a few key factors figured in:

·       We wanted to build the most boat we could to the highest state of completion possible within the allotted time.  Our goal wasn’t to be sure of finishing with a mediocre boat, but stand a chance of finishing with a robust, useful, complete product.

·       We wanted a boat that would be fun to have after the competition.  The boat had to sail well, and also be versatile enough to be used for fishing in Puget Sound, exploring up rivers, or short expeditions poking around the San Juan Islands.

·       We wanted a boat that was attractive.

·       We wanted to go with stitch and glue construction.  The was partly because you get a strong, tough, light boat in the end.  It was also partly showmanship—it is flashy and crowd-pleasing to have a boat-shaped object within a few hours of starting.

The Jimmy Skiff 2 design from Chesapeake Light Craft turned out to be a no-brainer, as the design really seemed to nail all of these attributes. 

Headed to Port Towsend with a Jimmy Skiff mast on the roof,
a PocketShip in tow, and a CLC Teardrop camper in the background.

The competition requires that you start from pile of raw materials, so we built our Jimmy Skiff from plans.  We were allowed to pre-scarf the plywood and lay out the parts ahead of time, so when the starting whistle sounded, we fired up our saws and started transforming plywood into boat parts.  Time really flies at an alarming pace during the competition, but I think we had the boat stitched together a little after noon on the first day.  After lunch, we did our tack welds with superglue, pulled the stitches and launched into a flurry of filleting and fiberglassing – on the interior of the boat, we pressed the 3-in glass tape that into the wet fillets and then laid up the fiberglass cloth that lines the interior over the wet tape.  Due to compressed timetable we were on, we were working with “Fast” epoxy hardener, which, as you can imagine, made this a terrifying race against time.

Plywood parts, cut out and ready.

Under the rules of the competition, working hours were limited to 9am-11pm on Friday and Saturday, and 8am-1pm on Sunday, for a total of 33 hours of working time.  With a team of four, that meant we could put in around 132 man-hours, pretty much in line with the 120-150 hours that these boats typically take.  Of course, that doesn’t tell the whole story.  With stitch and glue construction you have to work around epoxy curing times.  While we did a lot of things with Fast and Medium hardener, sometimes “Fast” wasn’t fast enough.  We got slowed down at least once when the epoxy filling the exterior seams wasn’t quite set in time.  It was the end of the first day of the build and we needed to round over the seams so that we could fiberglass the hull.  There were a few spots where the epoxy would gum up when we tried to sand it.  We tried a few things: buying some time by breaking for dinner, adding a little heat, and trying to push through by clogging a bunch of sand paper.  We got there and got the fiberglass on the boat, but it was a long night.

Preparing to stitch the bulkheads to the bottom


Just over an hour later, a boat appears

Fiberglassing late in the evening after stitching and filleting.


When you are working full-bore for 14 hours each day, you have to fight some exhaustion. Day 2 was very slow.  We didn’t have much to do—install the flotation, carlins, seat tops, quarter knees, and rub rails – but everything we did seemed to take forever.  On the bright side, there’s no time for the typical “sit down and think” problems that often bog down an amateur boat build.  When our seat bottoms didn’t fit quite right (probably a misaligned bulkhead), we did not have time to debate what the best solution was, we just had to commit to a course of action and hope for the best.

Day 2 -- Seats are in and rubrails are glued on and drying.

Day 3 -- The boat emerges from the tent for a rigging session

One thing that we were generally blissfully unaware of (i.e. too busy to take notice) were the crowds gathering around the Boat Building Challenge tent.  Every now and then, an inquisitive bystander would get our attention.   We did
occasionally catch a glimpse of the always-heartening sight of some our friends from CLC coming over to check on us.  The crowds became unavoidable, however, on the last day on the competition, when the hull was done and we had to pull her out from under the tent (and the protection of the ropes that had kept the crowds at bay) to rig her.  The manual suggests a leisurely driveway rigging session.  We had a pressure-cooker rigging session, with Festival-goers wandering through and trying to get an up-close look at the boat.  It turns out that Festival-goers are hilariously unaware of their surroundings, and more than one nearly got beaned by our boom, slapped by our sail, or skewered by our mast as we worked.

The crowds gather as the sail goes up.

Our competition was tough.  To one side were four soon-to-be graduates from the Northwest School of Wooden Boat Building.  On the other side was a well-practiced team (they apparently had done practice runs on their boat already), led by a professional shipwright.  The guys on those teams were real pros and true craftsmen who ended up building truly beautiful boats.  In the end, we finished the boat* about an hour before “tools down”.  While we broke for lunch, our Jimmy Skiff 2 sat proudly in front of the Boat Building Challenge tent, sail raised and trimmed in the gentle breeze.  Even on the hard, she was a smart little boat.  When the other teams finished and the whistle sounded, we all lugged our boats across the festival grounds for a trial-by-water. 

The launch

Two of us took our Jimmy Skiff 2 out on her maiden voyage.  She cut a fine form on the water and rowed well.  We raised sail, but the wind would not cooperate.  We rowed around a little bit and had fun, enjoying being on the water.  The other teams, though, really pulled out the stops when it came to showmanship.  One team brought along a girl in Victorian garb to be rowed about in their lovely clincker-built rowboat.  The Wooden Boat School team went even farther, loading all four team members, a cooler, and some fishing rods into their drift boat – those guys knew how to have fun!  We all had a brief, but successful tour of the harbor, before returning to be judged. 

Jimmy Skiff

Launching area


The Boat School guys were a blast, and built a great boat.

3rd Place


In the end, we took home third place, which was just fine by us given the level of competition and how good the boats the other teams built were.  Not that we made it easy for them; the judges were impressed enough with our Jimmy Skiff 2 that they upped the monetary part of our prize to equal that given to second place.  For a bunch of amateurs, that seems  pretty good, and is a testament to the Jimmy Skiff 2’s tidy look and well-thought out design, not to mention the quality of the manual, which was required reading for all members of our team.


*There is still a ton of sanding, varnishing, and painting to do.


Sunday, March 20, 2022

A Project Named Clancy - XII. Spars and Rigging

The plans for Clancy call for spars made of aluminum tubing.  This was probably done for a number of reason--ease of sourcing for the amateur builder, the ability to take the mast apart for ease of transport, the durability in livery fleet use, etc.  I could not bring myself to sully my new wooden boat with aluminum tubing, and thus settled building them out of Sitka Spruce.  Reading up on it, it I realized that sizing wooden spars for adequate strength and rigidity if more art and experience than science and mathematics.  After several efforts to figure it our myself, I lay the problem before a well-known boat designer friend.  Based on his input, I settled on a 2 1/8" square cros-section for the mast up to the top of the gooseneck, tapering to a 1" square section at the masthead; the edges of the mast above the deck would be rounded over with a 1/2" router bit.  For the boom, a 1-1/2" square section was used, with each end tapering to 1/2"x1" over the last 2 ft.  As mentioned in previous posts, the modification to the mast resulted in changes to the mast tube (square plywood "tube" instead of PVC pipe) and the sail (external sail track instead of a sleeve).

The mast is around 16-ft long, so one Saturday, I put the roof rack on the car, took the ferry to Port Townsend, and brought home a nearly 17ft long 6/4x6 chunk of beautiful Sitka Spruce from Edensaw Lumber. 

The first step was to run the board through the surface planer a few times.  Planing a 17' board is a bit of handful, and required taking the planer outside to find a space over 34' long; you need 17' on the infeed side and 17' on the outfeed side to avoid running into anything.  My garage can barely hand the first 17ft!  


I then marked the masts and booms on the board and roughed them out with a circular saw.  Yes, mast and boom were both plural.  In the coming pictures, you will find evidence of two Clancy's worth of spars being made at the same time.  Could this indicate that I'm planning another Clancy in the future?  Stay tuned.


Dressing spars is a delight.  Unlike the gooey epoxy and fiberglass work inherent in plywood boat construction, spars are all saws, planes and sandpaper.  After rough cutting the tapers in the spars, I used a power plane, followed by a belt sander and then a low angle block plane to bring them right to the pencil markers.


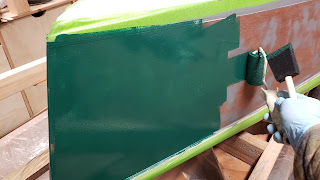
Next, the edges were eased with the router, using a big roundover bit.


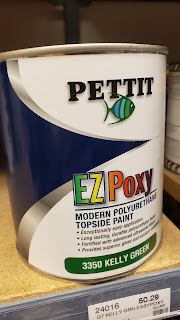
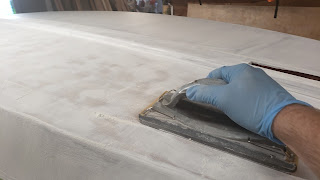
After sanding smooth with 220 grit sandpaper, multiple coats of varnish were applied.  For Clancy's spars, I experimented with TotalBoat's Halycon water-based varnish.  Application was ok (I like the flow of the oil-based varnishes that I'm familiar with), and the final color after several coats was passable (not quite as deep amber as with the usual products).  On the bright side, drying/recoat times were closer to an hour, rather than a day for oil-based, so all 5 coats of varnish went on in an afternoon, rather than a week!  It is a good product, though I will likely stick with the old fashioned stuff on future projects.


With the spars shaped and finished, it was time to install the hardware.  I went with a Racelite small boat gooseneck that I bought from Duckworks.  I had wanted a 1/4" pin, but due to all the COVID-related supply-chain issues, they only had 3/8" pins. 


The boom end get a hole of the same diameter....


...so that it slides over the pin.


The sail track gets screwed into the aft face of the mast.  I was able to space the sliders on the sail just right to be able to get by with a single 12-ft length of sail track (sail track is devilishly expensive).


Since the sail must now be hoisted instead of slid over the mast, I had to add a block to the masthead for a halyard.


A quick test fit of the sail ensured everything was lining up properly.


I rigged the boom with a 2:1 outhaul.  The outhaul is deadheaded to eyestrap on one side of the boom, led through the clew, to a fairlead towards the end of the boom, and thence back to a jam cleat.


The boom also receives a pair of blocks, one at the clew end and one mid-boom to lead the mainsheet to the cockpit. 


The 2:1 boom vang consists of a block with a becket attached to a padeye on the mast with a stainless steel snap hook.


The block on the boom is shackled directly to a padeye.  The vang is tied to the becket on the mast block, run up through the block on boom, back through the block on the mast... 


... and then is lead through a fairlead to a jam cleat at the front edge of the cockpit.


This picture shows the details of the traveller.  The traveler is deadend at a fairlead on one side of the run, through through a fairlead on the opposite side and thence forward to a jam cleat at the aft end of the cockpit. The block for the mainsheet clips on to the traveller with a stainless steel snaphook.


Here you can see the whole path of the mainsheet.  The sheet led away from the cockpit via the two blocks on the boom, through the block clipped to the traveller, and then terminated on a becket on the after of the aftermost boom block.


The rudder is mounted to the cheeks with a big stainless steel bolt, with a wingnut on the end.  A pair of small boat pintles are mounted to the rudder and gudgeons are bolted/screwed to the transom.  A small tang on the transom keeps the rudder from floating off when the boat is in the water.


Two big deck plates seal up the area under the foredeck, while a thirds in installed in the aft bulkhead to seal up the transom compartment.  These watertight compartments provide flotation when swamped and can carry your lunch or be stuffed with foam for flotation, depending on your preference.


Rigged and ready....


Friday, December 31, 2021

A Project Named Clancy - XI. Finishing the Hull


It can be a struggle to select a paint color for a boat.  I like to start with a trip to the marine store to scope the available options.  Next, I use the computer to try out a couple of these options on the boat.   I've tried a couple different pieces of software in the past, but have to admit that I keep coming back to MS Paint...


For Clancy, I selected Interlux Brightsides Sea Green for the topsides, with a white bottom.  The decks would be varnished.

The Clancy plans do not show a waterline for the boat.  This led to the rather unconventional step of launching to boat to find and mark its real waterline.  The boat was dropped into the water for the first time, and the author's wife climbed in to provide an operational level of ballast.  A series of pencil marks were made around the hull at the point the water met the hull (i.e. the very definition of a waterline).  When I got the boat back to the shop, the boat was leveled levelled to its marked waterline, and then a laser level was used waterline It was quite a bit more work than simply striking a line based on plans, but on the bright side, there is little doubt as to whether the boat will float on her lines.


With the waterline marked, the hull underwent final touch up sanding and cleaning, and the bottom was masked off.  My typical method is to apply masking tape to within about 1/4 inch of the line, and then use 1/2 inch 3M Fineline tape to tape right up to the line itself (the Fineline tape overlaps the masking tape slightly this way).  Fineline is pricey stuff, but I think is worth the investment: unlike masking tape, it gives you very good control over where your masking line is, even around curvy shapes and I've never had any problems with paint bleeding through it.


Next comes primer.  When building a boat, you become used to seeing the wood of the hull.  It always feels a little strange when you first cover it with paint. 


A total of two coats of primer are applied, with each coat sanded until smooth and translucent.  


This has to be done by hand because power sanding generates too much heat and will just get gummed up.  Fortunately, the Interlux primer sands very easily.


Three coats of paint go on over the primer.


This process is repeated for the sides.  Since this boat is destined to be green, a gray primer is used.


The boat actually looks pretty sharp in gray.


The primer is sanded...


...and the hull is washed with 333 solvent.


This is followed by the green topside paint, applied using the roll and tip method.


I ended up applying four coats of topside paint.


Once the paint is all on, you get the reward of peeling off the tape and seeing the final look of the hull.


The hull gets flipped over and is ready for final sanding, cleanup and varnish.  Inside the cockpit, three coats of gloss varnish are applied to build depth, followed by a single coat of satin to knock down the gloss in this high traffic area.


The deck itself is destined to be finished with a high gloss.


You get an idea of the final look after the first few coats go on.


I ran into a terribly annoying problem.  My garage has become an inexplicably dusty place.  Despite diligently sweeping dusting and vacuuming everything I could touch prior to varnishing, the dust still settled, creating something more akin to a nonskid surface than the smooth, glossy finish I was shooting for.


I tried everything I could think of.  I sanded down the boat, cleaned the garage again and tried again, with little difference in the result.  I bought a Wen shop air filter, which may have helped, but not enough.  I built a small tent over the boat.  This was closer still, but still unsatisfactory -- why that didn't work is beyond me!  Finally, I took a risk and pulled the boat outside to varnish it.  This finally produced a satisfactory result.