Whhhrrrrrrrruppp! The sickening sound of thickened epoxy pulling
away from plywood came as I watched the bow of our Tubby Tug split open,
relieving the great stresses that had turn flat plywood into a pugnacious,
three-dimensional shape. In my hands was
a pair of side cutters and the remains final wire that had previously held the
bow together. Building a boat in two and
a half days requires some aggressive moves. Trusting that beads of superglue would hold the bow together so that we could remove the wires before the structural
epoxy fillets could set was one of the boldest we had to make. Now that it had failed, we had to
recover.
 |
| Saving the bow (credit: The Peninsula Daily News) |
As quickly as the bow had split open, my hands clapped it
back together. I squeezed with all my
might as my fellow team members, Ron and Chris, rushed over and began to sink
new holes in the sides and thread a multitude of wires stitches through
them. Over my shoulder, my dad kept the
reporter from the Peninsula Daily News at bay.
The reporter, who had just dropped in to get a story about the 2018
Edensaw Boat Building Challenge at the Port Townsend Wooden Boat Festival,
apparently did not fully pick up on the drama of a boat falling apart in front
of her, sparing us from a “fake news” headline.
Soon, with the stitches once again holding the tension, we smooshed the
big, still-wet epoxy fillet back in place.
The moment of crisis had passed, but there was no time to celebrate, we
still had a boat to build, and this setback meant that we’d had to shuffle our
build plan unexpectedly.
As I recall, it was my dad who first became enthused about
the idea of participating in the boat building challenge. The challenge has taken place annually for
several years at the Wooden Boat Festival, is and sponsored by Edensaw Woods,
Ltd. of Port Townsend, Washington. Teams
of four have two and a half days to turn a pile of raw lumber into a finished
wooden boat. Each team chooses their own
model of boat, and there can be a great diversity in the finished
products. The final boats are judged on
a wide range of (highly subjective) criteria, from workmanship, to fulfillment
of intended function, to the teamwork of the individuals.
Our team consistent of a bunch of rank amateurs: my dad and
myself, Chris, and Ron on the first and third days. Ron had built a Pygmy kayak before. Neither my dad nor Chris had ever built a
boat from scratch before. Due to prior
commitments, Ron was unavailable on the second day, and another total novice,
Ian, stepped in for him. We selected the
9-ft Tubby Tug design from Glen-L. A
review of the study plans had convinced us that the scope of Tubby Tug was such
that, if nothing went wrong, we could achieve a nearly complete boat, less any
sanding or finishing, within the allotted time.
The boat also has a ton of character, and our reckoning was that the
charming looks of the boat would go a long way toward the winning the
prize.
 |
| Glen-L Tubby Tug |
Each step of the build was carefully planned out in
sequence.
Much of the plan was built
around keeping the work going while working around epoxy drying times.
As a result, the choreography often differed
from the Glen-L instructions.
To be successful
we had to have a completed hull, with fiberglass on the exterior by the end of
day 1.
Day two would be focused on
building the pilot house and making incremental progress on the hull, adding
items like rubrails.
Day 3, hopefully,
would revolve around bringing it all together and adding finishing
touches.
While no wood could be cut
prior to the starting gun, a large amount of prep work is allowed.
We pre-marked all of the plywood parts on
10-ft long sheets of okoume.
Knowing
that there would be no time for painting the boat, we chose to apply stain to
many of the parts, so that in the end we would have a doughty little green and
red, and yellow tug.
The surfaces of the
plywood that would not later receive fiberglass were presealed in two coats of
epoxy.
The timber that would later form
the rubrails and trim were also premilled.
We were allowed to set up our work area the day before the
competition. A total of five teams were
competing, and Edensaw allocated each team a 10’x20’ work area under a large
tent. The front 10’ span faced the
festival crowd, and was roped off to prevent lookie-loos from wandering into
the work areas. We were wedged between
team from the Wooden Boat School and their plywood pram, and a team of semi-pro
boat builders and their carvel-planked rowboat.
We set up a tool box and epoxy-mixing table at the back of our work area
and laid the first piece of plywood that we would cut on sawhorses in the
middle of our area. Edensaw provided
communal bandsaws and waste bins.
 |
| Set up and ready to build |
The starting whistle sounded at 9am sharp on Friday morning.
Our saws plunged into the plywood, liberating
part after part of Tubby Tug.
At times
we had four saws running at once: two circular saws working on the long,
sweeping curves, and two jig saws cutting the tighter radiuses.
Once the bottom and side panels were free, I
grabbed a drill and began drilling stitching holes.
The bottom was set up on a folding table and
parts straight from the saws were delivered to the table and stitched in, first
the bulkheads and seat sides, then the transom and hull sides.
By lunch, the lower hull was stitched
together.
 |
| The bottom of the hull is visible in the center |
We quickly checked the hull for twist, removing what little
there was with a few swift chiropractic moves. Then it became time to set it in
stone, or in this case, superglue. The
use of superglue was a key enabler for us to complete the boat, allowing us to
skip the time-consuming “tack weld” epoxy mini fillets. A short bead of superglue, a spritz of
accelerant, and parts would be held together well enough that the stitches
could be removed. Big epoxy fillets
followed on all of the joints, with a layer of 9 oz fiberglass tape laid over
fillets on the side-to-bottom joints. In
the bow, we held off removing the stitches until later, since it was not clear
if the superglue would hold it. We, of
course, later found out it did not.
 |
| Stitching the hull |
After dealing with the aftermath of “the bow incident,” we
reviewed our plan. Over the next several hours, we added cleats for the
foredeck and seat supports, and installed the foredeck and bulwarks, again
employing the superglue, wire removal, fillet-and-‘glass act.
By this point, it was getting pretty later
and we were all pretty knackered.
We
broke for a late dinner.
Returning to the
boat and hour later, we found things setting nicely.
The hull had a robust, solid feeling to
it.
Technically, we could have launched
it then with little ill effect.
We
briefly contemplated flipping the hull and trying to fiberglass, which had been
our goal for the day, but were too zonked to do it.
Waiting until the next day meant giving up on
having the three total coats of epoxy on the hull by launch day, but we had
been working nearly nonstop since the beginning of the day, and were likely to
make a mistake out of fatigue.
 |
Fiberglass. The tumblehome was a particular
pain to wet out. |
Saturday dawned, and we were all dragging out feet from the
efforts the day before. We decided to
split our efforts, with my dad and Chris working on the pilothouse build, while
Ian (feeling fresh since it was his first day) and I tackling getting the hull
ready for fiberglass. It turned out that
there was more prep work than we anticipated to get the hull ready for
fiberglass. We used our sanders to
round over the edges of the plywood joints. Some of the seams were not properly
filled, meaning we had to apply more epoxy and wait for it to cure. After this, we spread out the fiberglass and
set to work wetting it out. For such a
little boat, the hull has a lot of surface area, meaning the wet out took a
long time. It was additionally
complicated by the tumblehome of the bulwarks.
Ideally, the topsides would be ‘glassed separately once the hull was
upright, but we had no time for that.
Still, it was terribly vexing and very time consuming to get the epoxy
on and the fiberglass to lay against those upside-down surfaces.
 |
The pilothouse slowly takes
form. |
If the hull was a challenge, things were no better on the
pilothouse.
The pilothouse requires a
good bit of fiddly carpentry, and the instructions and plans provided by Glen-L
failed to give enough detail to readily sort it all out easily, particularly in
the heat of the battle and when you are tired.
By the time the hull had its coat of fiberglass, the side of the
pilothouse had barely come together.
It
was 2pm and clearly time to break for lunch.
Exhausted, lunch took longer than usual.
The rain started shortly after we resumed working. Historically, the weekend of the Wooden Boat
is not particularly rainy, but this particular rainstorm was historically
intense. To make room for building the
pilothouse at the back of the tent, we had pushed the still-drying hull to the
forward edge of the tent, and the rain began pelting against the wet epoxy on
the hull. Epoxy does not like to get wet
when it is drying; it has a tendency to bloom (turn white), get splotchy and
gummy. We had to spring into action fast
to get the hull to safety. The area aft
of the hull was quickly cleared, pilothouse parts and all. I moved to the bow as we prepared to slide
the hull back to safety. At that moment,
the wind gusts, flapping the roof on the tent, and unleashing the tens of
gallons of water that had been pooling directly over my head. I was wetter than a St. Bernhard in a
swimming pool, and the forward third of the hull hand standing water on
it. My teammates hooted at the hilarity
of it. I joined in, but remained focused
on rescuing the hull from further peril.
We swiftly repositioned the hull and set to work with paper towels (not
fun on the tacky surface) and a heat gun to try to remove as much moisture as
possible. It took a good chunk of time –
me dripping through all of it – but eventually we mostly recovered, getting
away with just a few splotches of bloom.
I do not remember if I ever got dry. I do remember most of the rest of the day
being demoralizing. Fatigue had set in
hard, and everything was a struggle. At
one point we tried a dry run of assembling the pilothouse, only to discover
that the roof of the cabin substantially underhung the sides. We fought with a few more things, trimmed
back the overhanging fiberglass on the hull, rolled on another coat of epoxy,
and called it a night.
 |
| Close to the end |
A good night’s sleep helped revive us, along with the return
of a re-invigorated Ron.
We uprighted
the hull, and did a little general cleanup on it.
There were a number of things we had to give
up on in the interest of time.
We left
the rubrails off entirely, and chose to fasten the gunnels with stainless steel
screws rather than bond them on permanently with epoxy.
We had to sacrifice the most, however, on the
pilothouse.
Our plan going in was that
we would do no work that would have to be undone later (after the Festival) in
order to properly finish the boat.
The
pilothouse, however, was in such bad shape that we had to abandon this.
High quality, permanent, bonded joinery gave
way to “Chinese construction,” littered with brads and screws.
Ill-fitting joints were covered up by
decorative trim pieces, conceived and fashioned on the fly by Ron.
It was all made to fit and look respectable
enough, but while the hull could stand up to a close Coast Guard inspection,
the pilothouse was more of a twenty-footer.
 |
| Tools down! |
Around thirty minutes before the end of the competition, we
had finished everything we could think to do.
We put down our tools and started to clean up.
The Wooden Boat School team was slopping
latex house paint on their hull and hitting it with a hairdryer to speed things
up.
The carvel planked team had given up
the night before, when a few unplanned hiccups made it impossible for them to
complete their boat on time.
The two
other teams, an amateur-built 20’ catamaran, and a collapsible rowing pram
built by a team of two, were also wrapping thins up quickly.
At 2pm sharp, the whistle blew, and the “building” part of
the Boat Building Challenge was over.
That only left the “Boat” part – seeing how well the various small craft
performed on the water. Since Edensaw tent
was positioned at the opposite side of the Point Hudson boat basin from the
boat launch, this meant that reaching the water necessitated holding an
impromptu parade of new boats through the Festival grounds. Our little tugboat was clearly a crowd favorite,
its cute little form garnering many looks, comments, and photographs as we
carried it around.
The Boat Building Challenge is not just a competition, but
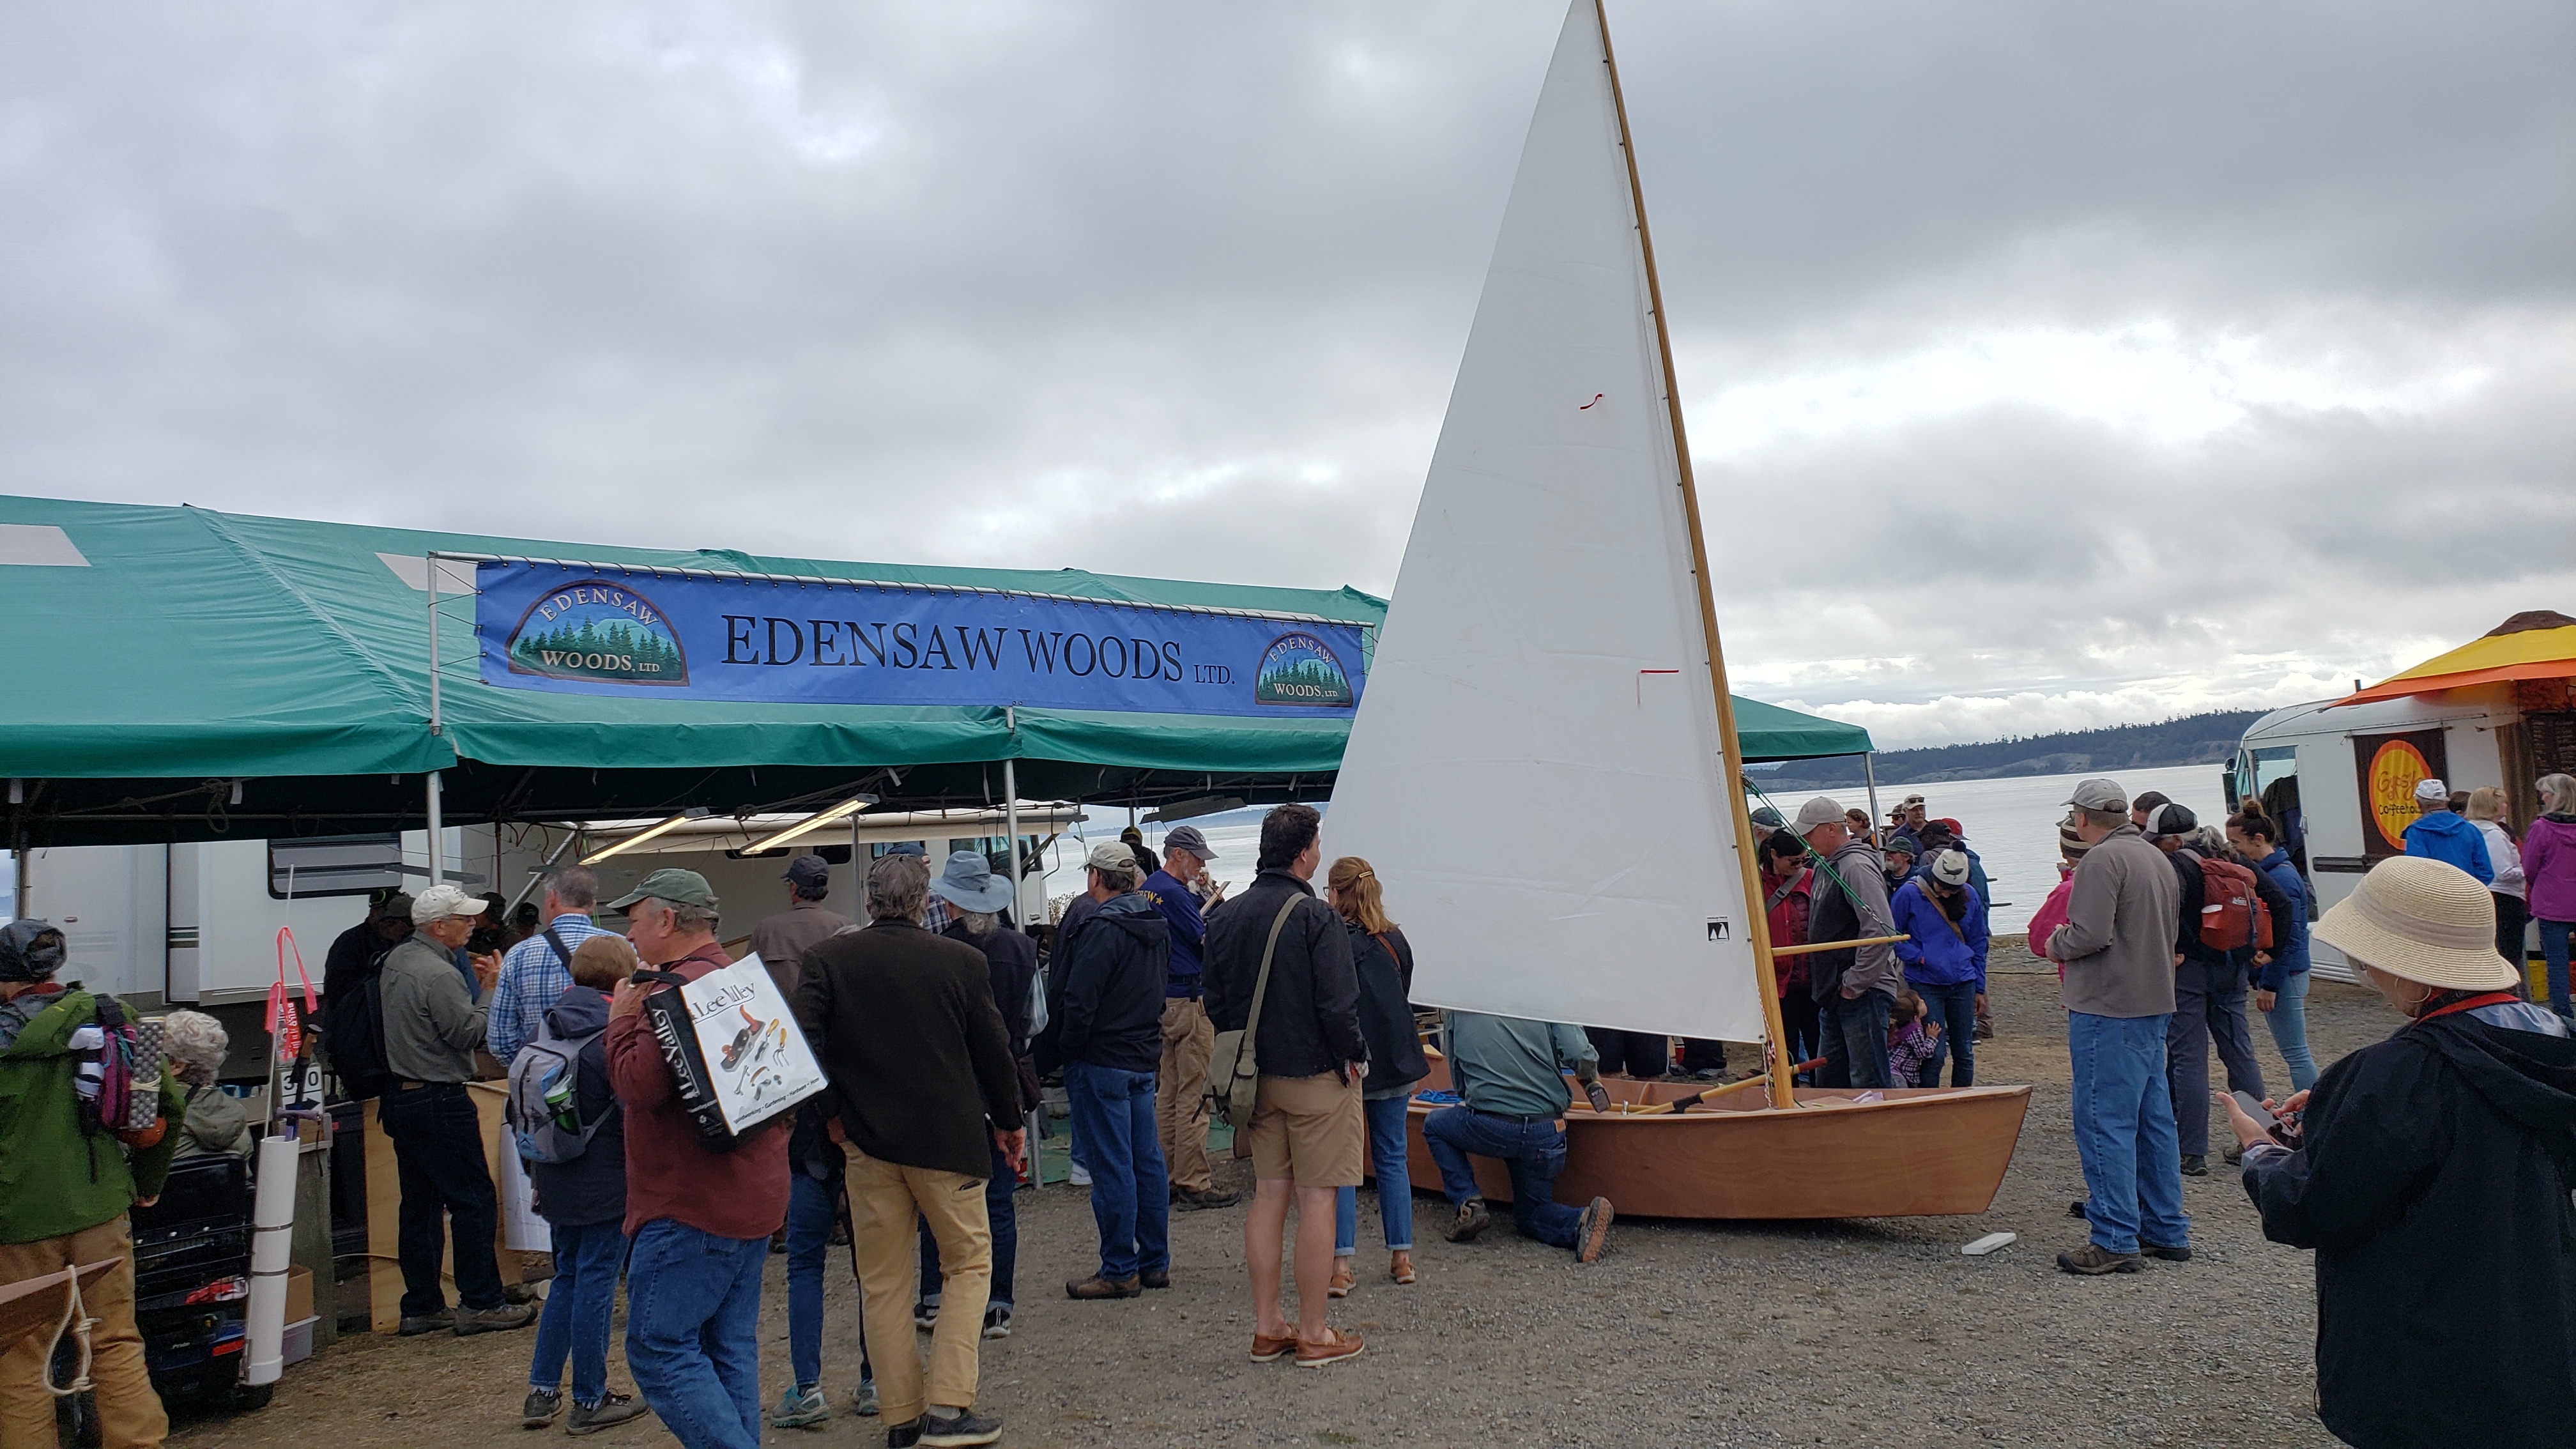
also a form of entertainment at the festival.
The ropes across the front of the tent help keep onlookers at bay,
though it is incredible just how far some people lean over. Some really want to ask questions, something
that can be a major distraction when you are working fully steam ahead. Mercifully, the Edensaw staff would swoop in
to rescue us if the questioning became intense.
On all three days, however, a bystander in a loud Hawaiian shirt slipped
through the guards and the barriers, and stood in our work area, asking us
questions and inspecting our work up close.
Not wanting to be rude, we did not throw him out, but were certainly
short in our responses to him. On
reaching the water, we learned this interloper’s secret: he was none other than
“Kiwi” Ferris, owner of Edensaw and chief judge of the competition. That would have been handy to know earlier.
 |
| Stroke! Stroke! |
One by one, the boats entered the water.
The Boat School guys had rigged theirs with a
sail, furled since it was blowing half a gale at the time.
My dad and I clambered aboard our Tubby
Tug.
Tubby Tug is designed to be powered
with a small outboard, but the Challenge rules prohibit using anything other
than human or sail power, so we seized up our canoe paddles and started
paddling furiously.
We were paddling
away from a rock-lined lee shore, and Tubby Tug has a huge amount of windage
for such a tiny boat.
Our departure from
shore was far from graceful.
We careened
this way and that, first toward the rocks, then towards a pier, then towards
the festival boats.
Meanwhile, the
catamaran had taken off out of the harbor like greased lightning, and the guy
in the folding pram was gleefully, and literally, rowing circles around
us.
We struggled our way out maybe 50’
from shore, before letting the wind rocket us back from whence we came.
 |
| Sharing the water with a competitor |
Judging came next.
The Wooden Boat School team, with their high quality build, (latex)
painted hull, and sail rig, took home the gold.
The sleek catamaran came in second.
The judges then debated, debated, and debated further.
When they finally reached their decision, it
turned out that had reached a deadlock, and to call third place a tie between
us and the pram.
It was hard to be
disappointed.
Most of the challenge is
not a competition against the other teams, but rather a competition against
yourselves to try to pull off something that is at the limit of possible.
And, while “there is no second,” it was still
gratifying to make that good of a showing against teams of the caliber of our
competitors.
Later that day, we hooked up an electric trolling motor to
Tubby Tug and putted around the Festival waters.
I was immensely satisfied with how the boat
turned out.
The boat was not done: the
pilothouse would later have to be totally rebuilt, the hull needed another coat
of epoxy, and rubrails and gunnels would later have to be permanently
affixed.
But the hull itself was a
really nice piece of workmanship, well-built, robust and fair.
In two and a half days, we had started a pile
of wood and no guarantee of having enough time to finish, and finished with a
functional boat with looks that delighted onlookers as we putted by.