Saturday, February 26, 2011

No epoxy

It has been really cold this week, so for the most part, working with epoxy hasn't been much of an option.


One of my top priorities this week was to lay out and cut out the bilge and topside panels.  In this endeavour, I succeeded.  Laying these panels out was quite an adventure.  Aside from using an awl to transfer the sixteen foot long panels, stitch locations, locations for the bulkheads and floors, and the portholes all had to be transferred.  The manual says this a lot of awl work.  I say it's an awl-ful lot of work.   Making the dots was one thing.  Going back with a pencil and rule to ply connect the dots....yipes.  Once all that was done, the circular saw make quick work of the cuts.
 
Cutting out the bilge panels

The topsides panels emerge.
 As I had feared, the scarf joint on these panels were as ugly as those on the panels.  So, there will be some epoxy filling and extra sanding required.  I'm really disappointed with the way that these scarfs turned out.  I'm really kicking myself for chickening out and using the circular saw and jig instead of the hand-plane method for cutting them.  Live and learn.

Another view of the bilge panels
 I've also worked a little one and off, trying to get more lead poured into the keel.  I have maybe half of the required lead poured.  For the reasons that I mentioned in an earlier post, it is slow going.  If I were to by a heavier pot (like cast iron), it would probably be over in a hurry.  Yet I persist with my rinky dink little pot.  Norwegian stubbornness...a blessing and a curse.

Getting more lead into the aft compartment.

Today was so cold that doing anything with epoxy was totally out of the question.  So, instead, I sanded the floors and bulkheads a bit, and then cut out the keelson.  With that, I have now cut out all of Pocketship's plywood parts.  Hoorah.

The freshly cut out keelson

 With the keelson cut out, I couldn't help but test fit it.

The keelson dry fit to the keel assemble

With the keelson fit, I couldn't help also test-fitting floor #4.

 Most of the the rest of the day was spent cleaning up the shop.  With all the cutting and gluing madness, the shop had become quite a mess.  It'll probably require one more good day of cleanup before stitch 'n glue operations begin.

Shop cleanup underway


I have a bit of filling and sanding to do on the hull panels, and then fiberglass the insides of the lower side and topsides panels, sand some more, and then those will ready for hull assembly.  On the keel side, I still have to get the rest of the lead poured, fit a cap on to the aft end of the keel, and install the keelson.  And I have layout, cut out, and assemble the building cradle. And the bulkheads and floors will need to take a couple of coats of epoxy to seal them.  Then, a little bit of shop cleanup, and it'll be time to start putting this thign together for real.

Tuesday, February 22, 2011

Not Quite Led Zeppelin...

...would you believe, Lead Keel?  Companionway to Heaven?  No?  Doesn't have quite the same ring to it.  At any rate, I have started to pour lead into my keel. This process has been a little more troublesome than it really has needed to be.  More on that later.

Before starting the pour, I have some cleanup to do.  A bit of work with the belt sander cleaned up some drips from the glue-up.  I then took my router and rounded over forward edges of the centerboard trunk.  These edges will be exposed in the cabin, so it is good to make them nice and smooth.  I also rounded over the bottom edge of the keel, which will come in handy much, much, much later in the build, when the bottom of the hull get sheathed in fiberglass.

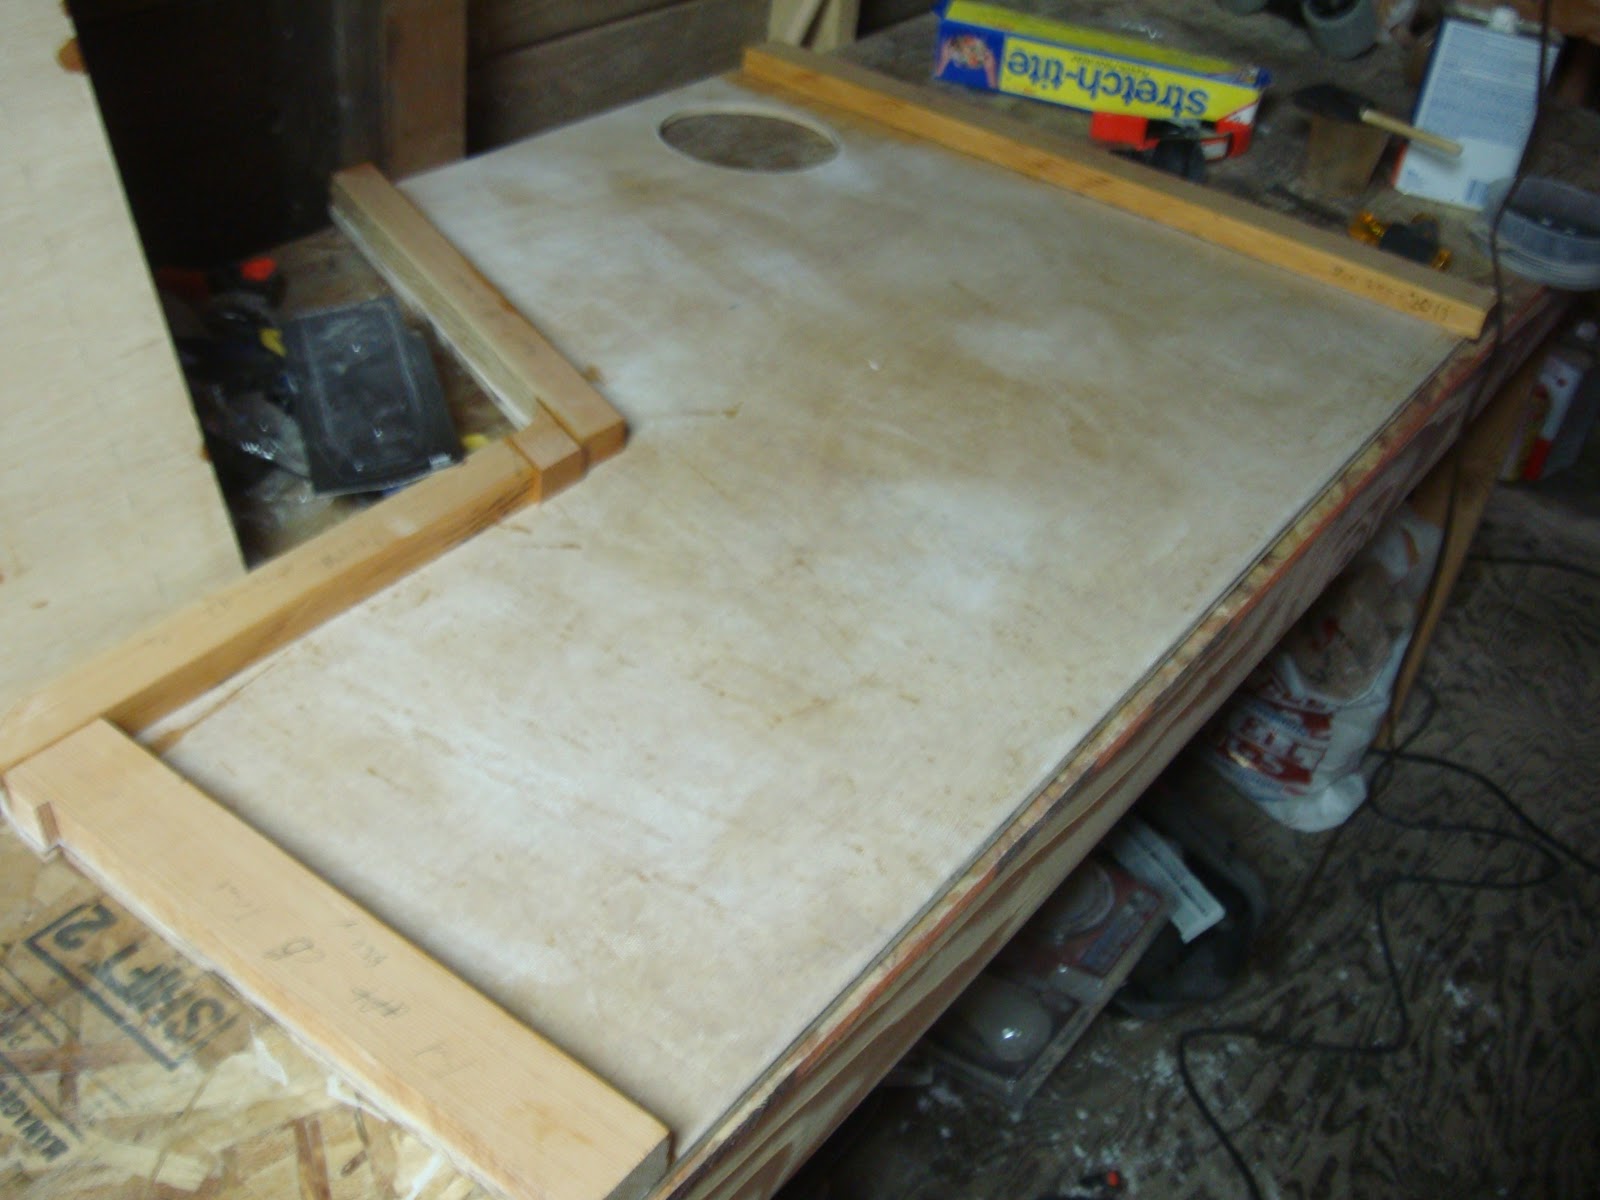
Test fit of the centerboard.  It slides in and out really nicely.

I screwed down a plate of plywood to one side of the cavity in the centerboard to enable the pouring of lead into it. 

I also took advantage of the keel assembly being light enough to lift onto the workbench to round over thebottom of the keel and the edges of the centerboard trunk that'll be exposed in the cabin.

I bought a small propane burner to melt the lead on.  I lit 'er up, filled my pot with the lead shot that I had purchased online, and waited.  And waited.  And waited.  The lead started to melt maybe a little, but never  really developed into a pourable pool of molten metal.  I tried for longer than I probably should have (the timescale is measured in hours).  Unfortunately, the little burner just didn't have BTU's to get the job done.  Also, the pot I'm using just isn't thick enough to hold the heat, so anything not directly exposed to the flame just wouldn't get hot.

I rectified the BTU problem by switching to an electric hotplate that I bought a while back for use in a steam box.  This little guy could melt the lead ok, but the pot is still a limiting factor.  Right now I'm just planning to live with that.

The next problem is with my lead.  When I ordered the lead shot online, I ordered the "unwashed" variety (they also sold "washed").  Big mistake.  There is so much gunk that floats up (carrying with is unmelted lead shot) that it really makes it difficult to get all the shot melted.  Right now my method is dump in a bunch of shot, melt it as much as possible, spoon off the gunk and whatever unmelted shot that go along with it into another container, pour the molten lead, and then drop the stuff I spooned off back into the pot to get as much of the rest of the lead out of it as possible.  This works ok, but is a little frustrating and time consuming.

At any rate, I've started pouring the lead.  I have the cavity in the centerboard filled, along with the area of the keel  forward of the centerboard (actually, a little overfilled in one spot) and have make 20lbs of the requisite 91 lbs in the compartment aft of the centerboard trunk.  I had to stop a little early today because, of all things, it started snowing in the middle of my smelting fun.  It is supposed to snow the next few days too, is the lead pour is now on hold for a little bit.


My first lead smelter.  This propane burner was too wimpy, so I switched to an electric hotplate.

Suited up and ready to go


The keel set up outside, ready for lead.

The lead shot, ready to melt

Melting underway.  Anything not silvery is dirt and dross


Adding lead to the forward compartment..


Getting lead into the aft compartment.   Still have a long way to go.


Snow!


There were some gaps and voids in the lead pour in the centerboard that had to be filled with thickened epoxy before the centerboard can get 'glassed. 
Filling the gaps on one side
Filling the gaps in the other


One more minor setback/problem.  I've decided that I'm not really happy with all of my scarf joint.  My plane-cut scarf for the keelson turned out perfect.  My chicken-out, jig-cut scarfs for the panels...well...didn't.  At least the ones in the boards that became the lower side panels just ugly along one edge.  The strength seems ok, but there are just gaps in the veneer.  After assessing the situation carefully, I decided to do the only logical thing and fill the gaps with thickened epoxy.  I'll sand it smooth once it's dry.  Hopefully that'll fix the problem.  I haven't inspected the other panels, but I wouldn't be surprised to find similar issues there. 

Filling the gaps in the scarfs.
It'll probably be a few weeks before I start stitching the hull together, but it is definitely getting closer.  And exciting.  I'm looking forward to it.

Saturday, February 19, 2011

Back at It

I've been a little sick recently, a fact which lead to a brief cessation of boat building activity.  Before getting sick, however, I did manage to get the rest of the keel glued up.  Key doing that was shaping a block of wood to form the noseblock, a task which I had previously hosed.  The second time was the charm, and I am pretty happy with how it came out.

The keel tapers from 2 1/4" at the centerboard trunk to 1 1/4" at the trailing edge.   Several other Pocketship builders have reported that it can be tricky to get the tapered section to stay centered about the boat's centerline, resulting in a keel that is bent a little one way or the other.  Trying to learn from other the builders', I worked pretty hard to keep things straight as I was gluing and clamping.  The keel is glued up whilst on its side, so I placed several shims under the tapered section to support  it and help it maintain the correct shape.  Sadly, after all this, I'm pretty sure I can detect a little waviness in the keel.  I'm not really able to fairly assess it yet, but a test fit of the keelson (which I haven't cut out yet) should be illuminating.

Knowing that with just a little cleanup the keel would be ready for ballast, I set out to hit up the local tire shops for used wheel weights.  I got to the first shop, I learnt that Washington State has followed the lead of California and banned lead wheel weights.  I could not help but note that in a move to be more environmentally correct, the goons at the Washington State Department of Ecology have made it significantly more difficult to build my zero-emissions, zero-carbon producing, doesn't-even-pull-electricity-off-the-grid, wind-powered vessel.  Just for that, I'm going to retaliate and drop an enormous '70's vintage, 2-stroke motor on the stern!

At any rate, the new rules went into effect on January 1st (why, oh why didn't I source my lead earlier???), and now tire places face fines of $10,000 if they give out lead weights.  This was a bit of a setback.  I ended up buying a couple hundred pounds of used lead shot from a website mentioned on the PocketShip forum.  It arrived within a few days.  So, hopefully I'll be pouring lead in the near future.


Starting to shape the noseblock.  The first passed where made with the table saw.

A little plane work, followed by sandpaper and the noseblock is beautifully shaped.

Getting the noseblock installed into the keel.

The assembled keel
That was all done almost two weeks ago.  Then I got sick.  Bleck.  Finally, yesterday, I was feeling better enough yesterday to put in a few hours on the boat.  I marked and cut out the lower hull side panels on one of the 16' long plywood boards that I had previously scarfed together.  The lower side panels are less than 24' wide, so I was able to mark just one panel, cut the board in half lengthwise, stack the two halves on top on each other, and (as I've done several times before) cut both boards at once, thus ensuring symmetry between the port and starboard sides.
Cutting one of my 16' (scarfed) pieces of plywood in half.  One half has the side panel marked on it.  the two halves get stacked and the port and starboard panels get cut at the same time. 

Almost done cutting out the side panels.
At this stage, the manual suggests attaching various 3/4"x1" timber "cleats" to various spots and the floors and bulkheads.  The cleats will be used later as attachment points for the cabin sole and various bits of decking.  So, I also spent some time cutting and gluing these down.  It is suggested to cut these pieces long and trim them back once they are attached.  It was a little cold out last night, so after clamping stuff, I brought the pieces inside the house to dry.
Getting the cleats cut to roughly the right length.  They will be bonded on and then trimmed back to the right length.

Cleats glued onto the bulkheads and floors.  Everything was moved inside the house to dry.

Hopefully I'll keep recovering quickly.  Next up will be the lead pours, finishing up the keel, and marking and cutting the keelson, bilge panels and topside panels.

Tuesday, February 1, 2011

Liberation

I have found that with the arrival of the epoxy, I have been liberated to start doing things that really feel like progress. 


A couple of hunks of wood, glued together to form a blank from which the noseblock will be formed.
PocketShip has a keel that runs about 2/3 of her length.  This keel is is essentially a hollow box made up of plywood sides and timber on the top and bottom.  The centerboard trunk runs through it, and a fair bit of the hollow space will be filled with the lead that helps make up PocketShip's ballast.    The the bow end of the keel is a noseblock made of timber, in my case, fir.  I didn't have a hunk of wood the right size for the blank for the noseblock, so I had to laminate one together.


 I mentioned earlier the rabbet cut into the centerboard that's to be filled with thickened epoxy that will be exposed when the centerboard is shaped to form an "armored" leading and trailing edge.  Since I knew I was entering a phase where I'd be making a bunch of thickened epoxy for various tasks, I set up the centerboard so that I could pour the leftovers from any given batch of epoxy into the rabbet.  It filled up pretty quickly.
Thickened epoxy poured into the rabbet in the centerboard

Since first reading the manual and looking over the plans, I knew that assembling the rudder would be one of the earliest things I'd work on.  So, I glued down the timber blocking that I had earlier cut out and shaped to one of the plywood rudder skins.  The next night I went out and glued on the other skin.

The rudder blocking glued to one of the rudder skins

The rudder takes shape
While I was gluing timber to the rudder,  I also assembled the centerboard trunk.

Here, the blocking has been glued to on side of the centerboard trunk. 

The centerboard trunk.
 Feeling ambitious, I went for broke and scarfed together the plywood for the hull panels.  I was going to cut the scarfs the old fashioned way, with a hand plane.  But, I chickened out and decided to cut them using a circular saw and jig as I had seen on Dave Curtis' PocketShip blog http://pocketshipadventure.blogspot.com/.  It turned out OK.  Later, when I cut the scarfs for the keelson, I chose to do so with the hand plane and discovered that that actually turned out better.  Go figure.  

Scarfing together the plywood panels that will make up the bilge, side, and topside panels.


After all of these adventures, I turned my attention back to the rudder.  The sides of the tiller slot are reinforced with 3/4" "cheeks."  I bonded those on, and also attached the rudder endplate.  I have mixed feelings about this endplate...basically a winglet on the rudder.  Aerodynamically (or hydrodynamically in this case), adding a winglet has essentially the same effect on a lifting surface as adding the same thing in span.  Since the rudder has to lift in both directions, it basically means that you get the benefit of more rudder area, but with twice the wetted area and thus twice the drag of just making the rudder longer.  Of course, the reason that winglets get added to airplanes instead of just increasing the span, is that some airplanes have span constraints (ok, some airplane have winglets because they've sexy, but that's nuts).  For me, that's what sold the endplate on the rudder for me.  Since PocketShip will be trailered, there is essentially a length-constraint on the rudder...a longer rudder would have to be removed before hauling the boat up on to the trailer.  I am thinking about doing a Mk.2 "long" rudder down the road...I could use it whenever I wanted to put the boat into racing mode.  :-)

Speaking of rudders, I had a crazy idea the other night.  I could add a seal between the rudder and the aft end of the keel.  This would greatly increase the power of the rudder and would reduce drag.  I haven't  thought through how to execute this yet, but the idea is alluring.

The assembled rudder.  This picture was taken before I added the fillets between the rudder and endplate.
 After all that dried I added two large epoxy fillets between the rudder and endplate.  Now I just need to sand down any rough spots on the rudder and fiberglass the sides and endplate...the cheeks won't need it.

Returning to the keel assembly, I set about shaping the noseblock.  Step 1 was to cut out 1/4" rabbets on either side of the aft end of the noseblock to receive the plywood sides of the keel.  Step 1 didn't go so well.  Somehow, I miscut the rabbets.  Twice.  I ruined my blank, so I had to laminate up a new one.  I'll have another go at the noseblock in the near future.
Getting ready to cut the noseblock.  Little did I know I was about to make a mistake and ruin this piece.
 In the meantime, I decided it was ok to assemble one side of the keel.  After shaping the few pieces of timber that forms the blocking, I puckied everything up, clamped it down and called it a day.
Here I'm test fitting the aft keel blocking

The aft keel blocking, glued and clamped to the port keel side.


The centerboard trunk glued to the port keel side.

 I definitely feel like things are moving forward, although I don't think that it has mentally registered that all of these bits and pieces and sub-assemblies will be coming together to form a real boat.