Friday, December 9, 2011

The Road to Painting

It doesn't seem like that long since writing and yet, looking both at the calender and my progress, I guess it has been longer than I thought. 

After getting the cabin sole fit, I realized that it was about time to tackle the last bit of fiberglassing that remained on the inside of the hull, namely the forward storage compartment (between bulkheads 1 and 2) and the area forward of bulkhead 1 (which will later be filled with foam and sealed off for flotation).  I hadn't viewed the 'glass work in these compartments as particularly intimidating, but in retrospect, I had been putting it off for some time.

First up was the forward most compartment.  This area was probably the hardest.  It is a long reach down in there and it is really hard to get down in there and do anything easily.  Fortunately, this area will get filled with foam and be closed up with only a 6" access hatch, so neatness in here really isn't important.  In addition to sheathing the hull in 'glass cloth, the seams in here also get a layer of thick fiberglass tape.  It took a fair bit of time hang half upsidedown in this compartment to get everything in an wetted out.  While that was drying, it also seemed to be a really good time to permanently install the lower breasthook.

The lower breasthook got put in place at the same time as the glass in the forwardmost compartment.

This space will be stuffed with foam, so I didn't bother doing too neat a job with the fiberglass in here.

The forward storage compartment was far easier to tackle.  The usual tape, wetout, trim, 3 coats of epoxy routine went on here, just like always.


The usual routine...

Wetting it out

The weather is cold now, so I have to use my "lasers" to help the epoxy cure.

Using the "lasers" has the side effect of creating great lighting.

After all that work fitting up the sole, and after a too-short time enjoying it's comfortable surface, it was time to pull it out again to pretty it up and finish it.  As with just about everything, the seemingly simple act of removing the sole took far longer than it should have.  A small handful of the bronze screws that held the planks in stripped out and two even broke.  It took several hours and much "persuasion" with a drill, Easyout and prybar to coax these few fasteners out. 

Finally got the cabin sole back out.

A pile of planks, ready to be spruced up.

With the planks out, the next thing to do was to take the router to them and put a nice soft roundover on the edges.  This process led the the realisation of just how many linear feet of edges these planks comprise!  This was followed by the realisation of just how much surface area there is, since I then had to take up my trusty sander and make everything baby-smooth.  Sanding the planks of the sole took several evenings of work.


Time to roundover the edges of the cabin sole planks.

Sanding the sole....this took a long time!

At some point, I got tired of sanding, and decided to take some time to fit up the cockpit deck.  It was pretty close to begin with, but required a little trimming to make everything fit just perfect.

Test fitting and trimming the cockpit deck.

Some trimming had to be done to accommodate the fillet.
Turning my attention back to the sole, it was time to apply several coats of Danish Oil to finish up the cabin sole planks.  It is a little cold in the shop right now, plus space out there is at a premium right now, so I brought in some cardboard and set up a "finishing shop" in the house upstairs.  The Danish Oil really brought out the best in the lyptus...wow, what a reward!  I can't wait until these go back in the boat.  They're going to look terrific.
Applying finish to the sole
Finally, it was time to get everything ready to paint the inside of the hull.  I whipped up a couple little blocks and installed them in the forward storage compartment to serve as a place to mount the battery later on.  Then I hooked up the ol' sander and went to work, cleaning up anything and everything that needed it in advance of sanding.  I figured there would be about an hour of sanding, but in the course of sanding I decided that this was one case where it'd be ok to let perfectionism reign, so I took..umm...a little longer than that.  Somewhere in the course of sanding, I began to hear strange noises from my vacuum.  Sounds like a bearing is going out...not good news.

I made these little thingies to serve as a place to mount the battery.


Sanded and ready for paint.
Finally everything was ready for paint, starting with primer and, in the near future the topcoat.
Primer goes on.

Painting is underway...what lies beneath the shroud?

In other news, I went hiking on Orcas Island in the San Juan Islands last weekend.  This will be one of my cruising grounds when I get my PocketShip done.  Here are some pictures...motivation for getting this boat in the water!
 
The very early morning in the San Juans


Days are really short right now.  This is about 3:30 in the afternoon.

Just imagine cruising your PocketShip here!

Friday, November 11, 2011

Sole Man

In the now-classic (and outdated) book about the aviation, the Sporty Game, the concept of the "Learning Curve" is addressed.  In manufacturing airplanes, the first airplanes off the line are always the most expensive to produce, since the assembly processes are still being refined and the mechanics are performing their tasks for the first time.  As more and more airplanes are produced, you come down on the Learning Curve and the cost and build time of each airplane is reduced...dramatically at first and finally more gradually until (all else being it equal) is asymptotes.

There are Learning Curves in boatbuilding too.  In the case of PocketShip, there is the manual and several excellent blogs that detail the construction of the design.  As a result of reading these, I am farther down the Learning Curve than those who have gone before me.  I am able to steal ideas from other builders to make my boat better or more easily, and am able to (attempt to, at least) avoid some of the trouble earlier builders have had.  Having built other boats also helps bring you down the Learning Curve, as there are several techniques that I picked up on my Pygmy and Redfish kayaks that I've applied to PocketShip.  Of course, there are plenty of things that you don't learn until you do them, plenty of head-scratching and opportunities for making mistakes.

Take laying the cabin sole, for example.  Dave Curtis' blog mentioned that he used the old deck building trick of using a nail as a spacer to keep the correct gap between the planks when cutting his cabin sole.  I probably would have ended up doing this even if he hadn't written about it, but as it was I didn't have to spend any time at all thinking about how to get the right gap between the planks because Dave's work moved me down the Learning Curve.


To keep the proper spacing between planks, I used the standard "nail spacer" trick used by deckers and PocketShip builders alike.

The first few inboardmost planks were fairly easy...just cut to length.  Even so, it probably took more than an hour each for the first four planks, just because I was working out the procedures to install each board.   This got faster as I learned to start from the middle of the plank and work out towards the ends.  To keep the the screw spacing consistent, I made a small guide just the width of my planks with two holes drilled in it.  All I had to do was line this guy up, run my drill down through the holes and, viola, consistently spaced holes!


Getting started laying the sole.

In order to keep the screw spacing the same, I made this handy little jig.


The first four planks on either side were easy.


After the first four planks thing got tough. Both ends of each plank needed to be cut in both planform and profile to meet up with the hull just right. Figuring out how to mark and make this compound cut was extremely challenging time consuming and it really didn't feel like I was moving down the Learning Curve until I was about halfway through. My general approach was to use a short offcut from a previous plank, mark and cut in in planform and then bevel the edge the right angle so that it would firmly contact the hull. Once I got this right (it was a sometimes iterative process), I marked and cut the real board, using my scrap piece as a guide. I guess I went the measure once, cut twice route.  Initially, it would take me about two hours to get a plank in, though as I came down the Learning Curve, this time would eventually be cut in half.

This is all easier said than done, though.  First of all, figuring out the correct angle at which to cut the plank wasn't all that easy.  The manual wasn't much help and neither were most of the blogs out there.  Sean's blog mentioned touched on it, but I was unable to translate his writing into practice.  So I experimented.  Angle meters, projecting lines, mathematics...ack!  I didn't use the same method twice until the final three or four planks, and by then the method that I settled on was to more-or-less eyeball it and use intuition.  The lack of engineering rigour in this approach bugs me a little, but, hey, it worked.  Cutting was much easier, after one attempt with the miter saw, I switches to the circular saw and never looked back.

Bevelling the planks was even trickier.  Finding the correct angle to cut was quite an exercise...again the intuitive approach ended working out the best, but sadly I only learnt that on the final planks.   Cutting them was even trickier.  After a lot of wasted time with a belt sander and a few dubious flirtations with some crazier tools, I switched to the boatbuilder's ultimate weapon, the simple block plane.  This worked better than anything, but took a lot of muscle power. 


A beautifully beveled board.

It took many trial fits to get it right.
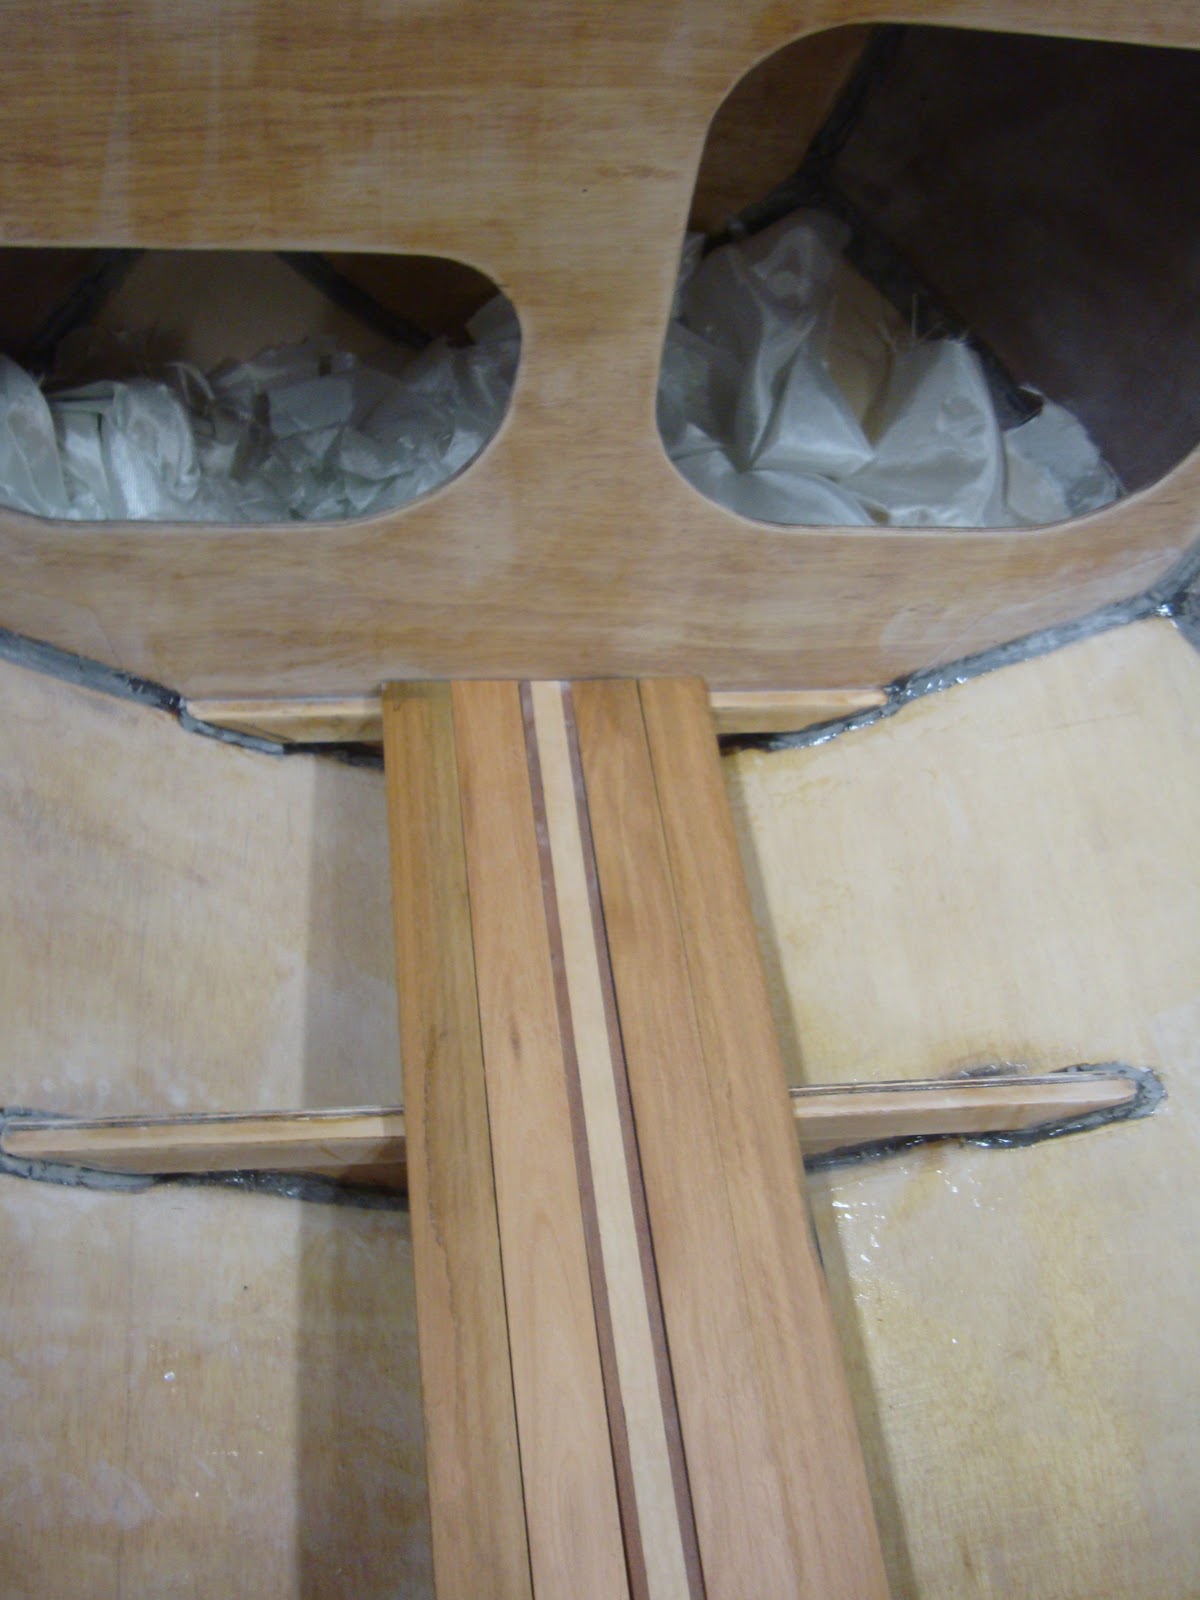
To complement the centerline accent board, I laminated up two more figured maple/bloodwood planks to place outboard.  I really like to look of those pieces!

The outboardmost planks were extra tricky.  Folyptus.  I measured the required length of the plank, along with the location and dimension of it's maximum breadth, and then used a batten to strick a fair line.  After a quick cut with the circular saw, a ton of plane work, and plenty of test fitting, I was satisfied.

It took many hours of work to get this far.  Note the accent plank and the extra-wide plank outboard of it.

After that, I just had to repeat everything on the opposite side and I had a great looking cabin sole.  It took way longer than I expected, but it was all fun carpentry-type work, so that was nice.  And I'm very happy with the way it turned out, appearance-wise.  It is also really comfortable; I sat there quite a while after finishing, enjoying the fruits of my labors.  I even explored what it feels like to lay down aboard. 

After waking up, I took a long batten and struck a fair curve along the outboard edges of the sole and will trim the remove all the planks and trim them back to that line.  Then I'll have to round over the edges of the planks, sand, sand, sand, and then finish the planks. 
Finally finished

With the cabin sole in, I couldn't help but sit back and rest a bit.

This quickly devolved into a slightly more relaxed posture.  How great is it to have a project you can lay down in and snooze whilst building it? 

Using a batten to strike a fair curve along the edges of the sole.

So, that's the story of my cabin sole.  One thing you have to love about boat building is the vocabulary...the formal nautical kind, not the salty kind which also has a place. There's English and there's Nautical English. On a boat, a floor is a transverse structural member that ties frames together (PocketShip doesn't have frames, but it still have components positively identifiable as floors). That which on land is called a floor can either wind up being a sole or a deck on a boat. A landlubbers walls are, of course, called ceilings on a boat. And so on.

Another project I've been working on is laying out the locations for the electronics. I intend to mount the radio and light switched straight on to Bulkhead 2. The breaker panel and battery switch will be mounted on a recessed panel and covered with a little hatch...they're ugly and I don't want to have to look at them when I'm not using them. I also plan to build a little "glove box" storage thingy, big enough of glasses, a wallet, MP3 player or other sundries.

Mockup of the electronics locations of Builkhead #2

Open the hatch to access the battery switch and breaker panel


Recesses Panel for battery switch and breaker panel.

 
Also, I finally finished and delivered the cradle boat to my friends.  The baby is due Sunday, so hopefully it'll be getting some use soon.  The parents plan to name the bundle of joy "Charity,"  so I call the little boat "S.S. Caritas"


S.S. Caritas, ready to set sail

Thursday, October 20, 2011

Ready to Move On

"Sanding the interior to a truly finished surface is going to take awhile. "  - PocketShip Manual

No kidding.  This was easily the task I've most dreaded in building this boat.  But, after about 6 hours of sanding, I'm basically done sanding the interior of my boat, and ready to move on to other tasks.  I did a pretty good job with the fiberglass work, otherwise it could easily have taken twice as long.  I'm tempted to post a long series of photos showing the progress as I sanded.... That would be one boring sequence of photos.
 
There are still probably another 2 hours of so of sanding that will have to be done before I'm ready to paint the interior, but it doesn't make any sense to do any more now, since in the meantime I'll be making a mess of some of those areas.  For example, before I paint, I'll be building a place to mount a battery, and will be cutting holes for various electrical components, etc.  and in the process of doing that, there will be some epoxy sloshed around that will need to be sanded.
 
Anyway, the bottom line is that I'm moving on.  The next big job will be to fit up the cabin sole.  I got started on that last night managed to get one plank installed.  After that's all done, I'll be working on laying out and constructing hard points for various systems on the boat (battery box, electrical panel, radio, bilge pump, etc).  And I've still got a little bit of fiberglass work to do forward of bulkhead 2!!!  Can't forget that.  Then a little more sanding, and time for paint!

I picked up a couple of components for the electrical system already.  Holes for these will be cut soon.

The first board of the cabin sole has been installed!

Wednesday, October 12, 2011

Cleats, Clamps, Carlins, Carborundum, and Eucalyptus

I've spent some time sanding my newly-fiberglassed interior.  I am pleased to report that it is going pretty quickly.  I have spent around 3 hours sanding so far, and am just over half done.  Unfortunately, a lot of the sanding remaining consists of tight corners and small, hard to get to spaces.  Not fun, but I did a pretty good job with the glass work, so it isn't as bad as it could be.  And I am motivated to get it done, since after I'm done, there are a done of fun projects that should really advance the "doneness" of the boat quickly.  Motivation is good

So..weird story...I was out sanding away when suddenly I started smelling spaghetti inside my respirator.  Thinking that my sander or vacuum might be about to explode, I quickly shut down everything, pulled off my mask and...no spaghetti smell.  Mask back on, spaghetti.  I started sanding again and the smell went away.  A few minutes later, though...spaghetti.  Again, no smell outside the mask (except, of course, epoxy dust). More sanding, smell goes away.  Then it comes back again.   Strangest thing I've experienced whilst sanding.  I finally decided to interpret it as being time for dinner, so I hung up my sander, called it a night, went inside the house and ate...chicken.

Interlaced with sanding, I've tackled installing the framing that will support the cockpit deck and footwell.  In sharp contrast to all the epoxying that I've been doing recently, here I'm measuring, cutting, and installing wood, and as I do so, the boat looks different, so it feels like I'm actually building something.  Fun and highly rewarding. 
In the manual, it looks pretty straightforward to cut and install all of these cleats, carlins, and beams.  In actually doing it, you realize that there are a ton of compound angles everywhere.  Lot's of dry fitting and lots of measure twice, cut once, mesure once, cut twice, etc.  Also, just locating the cleats in the right places, particularly on the transom, front send of the footwell, and on the footwell sides was trickier than expected.  Lots and lots of dry-fitting is required to make sure everything is where it should be.  It goes slower than you expect, but it is awfully fun work, so no complaints.

Getting the angle of the hull.  The deck carlins are beveled to this angle

Set the sawblade to the right angle


Run it through and you get this!

Here's what it looks like in the boat

Next up, cover everything you see here in more timber

Once again, my clamp collection is deployed en masse
In the manual, the cleats on Bulkhead 8 are shown inside the cabin.  I didn't see any reason for that and figured that if they were installed inside the water-tight compartment, it'd save me some sanding and finishing.  So, that's what I did.


I was constantly dry fitting the footwell sides to check the placement of everything

There were lots of compound angles
The beams of the transom need to be notched out to receive the carlins coming in from Bulkhead 8.  The manual has these cut out after the beams have been glued.  Fellow PocketShip builder Sean came up with a nifty idea that I stole.  His idea was to pre-mark the cutout and the beam, and cut about halfway through the beam from the back side.  Then, glue in the piece, being careful not to get any glue on the bit you'll be removing.  Once everything is dry, simply pick up your saw and finish the cut.  Thus, the beam is aligned across the notch, and it doesn't take any swearing or chisel work to get it out.  Thanks for the great idea, Sean.
Before gluing the deck beams onto the transom, I pre-cut the notches into the back side where it is notched out to receive the carlins.  After it was glued down, I finished cutting it out.

Ready for a carlin

More cleats/carlins.  Notice that I've temporarily set the aft carlins in place...in the wrong spot.  They should be in the
next notch outboard

I've spent quite a long time at Martin Lumber, trying to select an appropriate wood for my cabin sole.  I wanted something hard and tough, with a nice, tight grain, and a mellow, luxurious colour to it.  I looked at teak (too expensive), mahogany (too soft), maple (too light in color), blood wood and paduak (both too dark),  cherry (grain wasn't what I was looking for), oak (too ubiquitous), etc, etc.  Finally, I settled on something called lyptus.  It's hard, heavy, millable, sustainable, has a beautiful, tight grain, and a gentle reddish color.  I did a little research on it, and it turns out that it is a plantation-grown eucalyptus hydrid.

I also wanted to add a little bit of flash to the inside of the cabin, so I decided to glue up a piece of figured maple between two strips of bloodwood to serve as an accent plank.  When finished, the figured maple has and awesome iridescent quality.  Add in the deep-red contrast of the bloodwood, and I think it'll look awesome.  Right now the plan it to run one of these accent strips down the middle.  I'll likely also run one more on each side farther from the centerline.  I'll be playing around with it as I lay the sole, and see what looks right.

I've taken a couple of scraps of the woods and experimented with a couple of different finishes.  High-gloss polyurethane or varnish are out...too garish.  I want a nice, soft, luxuriously satin finish.  Danish oil looks really good on the lyptus, but doesn't totally bring out the iridescence of the figured maple.  The the accent strips might end up getting a satin polyurethane, but I need to see how everything plays together.

I have yet to start putting down the sole.  I think I'm going to finish sanding the interior  and get the distasteful job out of the way first.  But gosh, it is going to be fun, so I'm having trouble holding off.   Also, I don't think I've explicitly mentioned this, but I haven't yet 'glassed the bilge panels forward of bulkhead 2.  It's been on my to-do list for a while, but the other projects have taken precedence largely because they're more rewarding.  But I will have to tackle that soon.  Anyway, more to come!
The makings of a nice sole.  The figured maple/bloodwood laminated piece is in the center, flanked on either side by lyptus.
Here's another view.  Notice the beautiful matte-grey-ish color of the sanded 'glass inside the hull