


It can be a struggle to select a paint color for a boat. I like to start with a trip to the marine store to scope the available options. Next, I use the computer to try out a couple of these options on the boat. I've tried a couple different pieces of software in the past, but have to admit that I keep coming back to MS Paint...

For Clancy, I selected Interlux Brightsides Sea Green for the topsides, with a white bottom. The decks would be varnished.
The Clancy plans do not show a waterline for the boat. This led to the rather unconventional step of launching to boat to find and mark its real waterline. The boat was dropped into the water for the first time, and the author's wife climbed in to provide an operational level of ballast. A series of pencil marks were made around the hull at the point the water met the hull (i.e. the very definition of a waterline). When I got the boat back to the shop, the boat was leveled levelled to its marked waterline, and then a laser level was used waterline It was quite a bit more work than simply striking a line based on plans, but on the bright side, there is little doubt as to whether the boat will float on her lines.

With the waterline marked, the hull underwent final touch up sanding and cleaning, and the bottom was masked off. My typical method is to apply masking tape to within about 1/4 inch of the line, and then use 1/2 inch 3M Fineline tape to tape right up to the line itself (the Fineline tape overlaps the masking tape slightly this way). Fineline is pricey stuff, but I think is worth the investment: unlike masking tape, it gives you very good control over where your masking line is, even around curvy shapes and I've never had any problems with paint bleeding through it.

Next comes primer. When building a boat, you become used to seeing the wood of the hull. It always feels a little strange when you first cover it with paint.

A total of two coats of primer are applied, with each coat sanded until smooth and translucent.
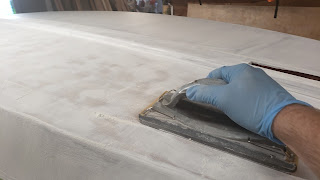
This has to be done by hand because power sanding generates too much heat and will just get gummed up. Fortunately, the Interlux primer sands very easily.

Three coats of paint go on over the primer.

This process is repeated for the sides. Since this boat is destined to be green, a gray primer is used.

The boat actually looks pretty sharp in gray.

The primer is sanded...

...and the hull is washed with 333 solvent.

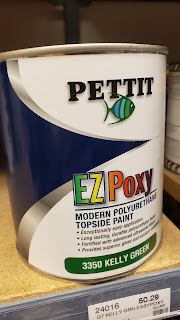
This is followed by the green topside paint, applied using the roll and tip method.
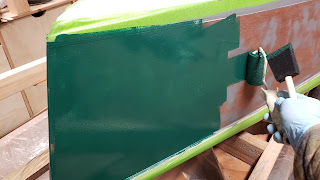
I ended up applying four coats of topside paint.

Once the paint is all on, you get the reward of peeling off the tape and seeing the final look of the hull.

The hull gets flipped over and is ready for final sanding, cleanup and varnish. Inside the cockpit, three coats of gloss varnish are applied to build depth, followed by a single coat of satin to knock down the gloss in this high traffic area.

The deck itself is destined to be finished with a high gloss.

You get an idea of the final look after the first few coats go on.


I ran into a terribly annoying problem. My garage has become an inexplicably dusty place. Despite diligently sweeping dusting and vacuuming everything I could touch prior to varnishing, the dust still settled, creating something more akin to a nonskid surface than the smooth, glossy finish I was shooting for.

I tried everything I could think of. I sanded down the boat, cleaned the garage again and tried again, with little difference in the result. I bought a Wen shop air filter, which may have helped, but not enough. I built a small tent over the boat. This was closer still, but still unsatisfactory -- why that didn't work is beyond me! Finally, I took a risk and pulled the boat outside to varnish it. This finally produced a satisfactory result.


No comments:
Post a Comment