Thursday, October 20, 2011

Ready to Move On

"Sanding the interior to a truly finished surface is going to take awhile. "  - PocketShip Manual

No kidding.  This was easily the task I've most dreaded in building this boat.  But, after about 6 hours of sanding, I'm basically done sanding the interior of my boat, and ready to move on to other tasks.  I did a pretty good job with the fiberglass work, otherwise it could easily have taken twice as long.  I'm tempted to post a long series of photos showing the progress as I sanded.... That would be one boring sequence of photos.
 
There are still probably another 2 hours of so of sanding that will have to be done before I'm ready to paint the interior, but it doesn't make any sense to do any more now, since in the meantime I'll be making a mess of some of those areas.  For example, before I paint, I'll be building a place to mount a battery, and will be cutting holes for various electrical components, etc.  and in the process of doing that, there will be some epoxy sloshed around that will need to be sanded.
 
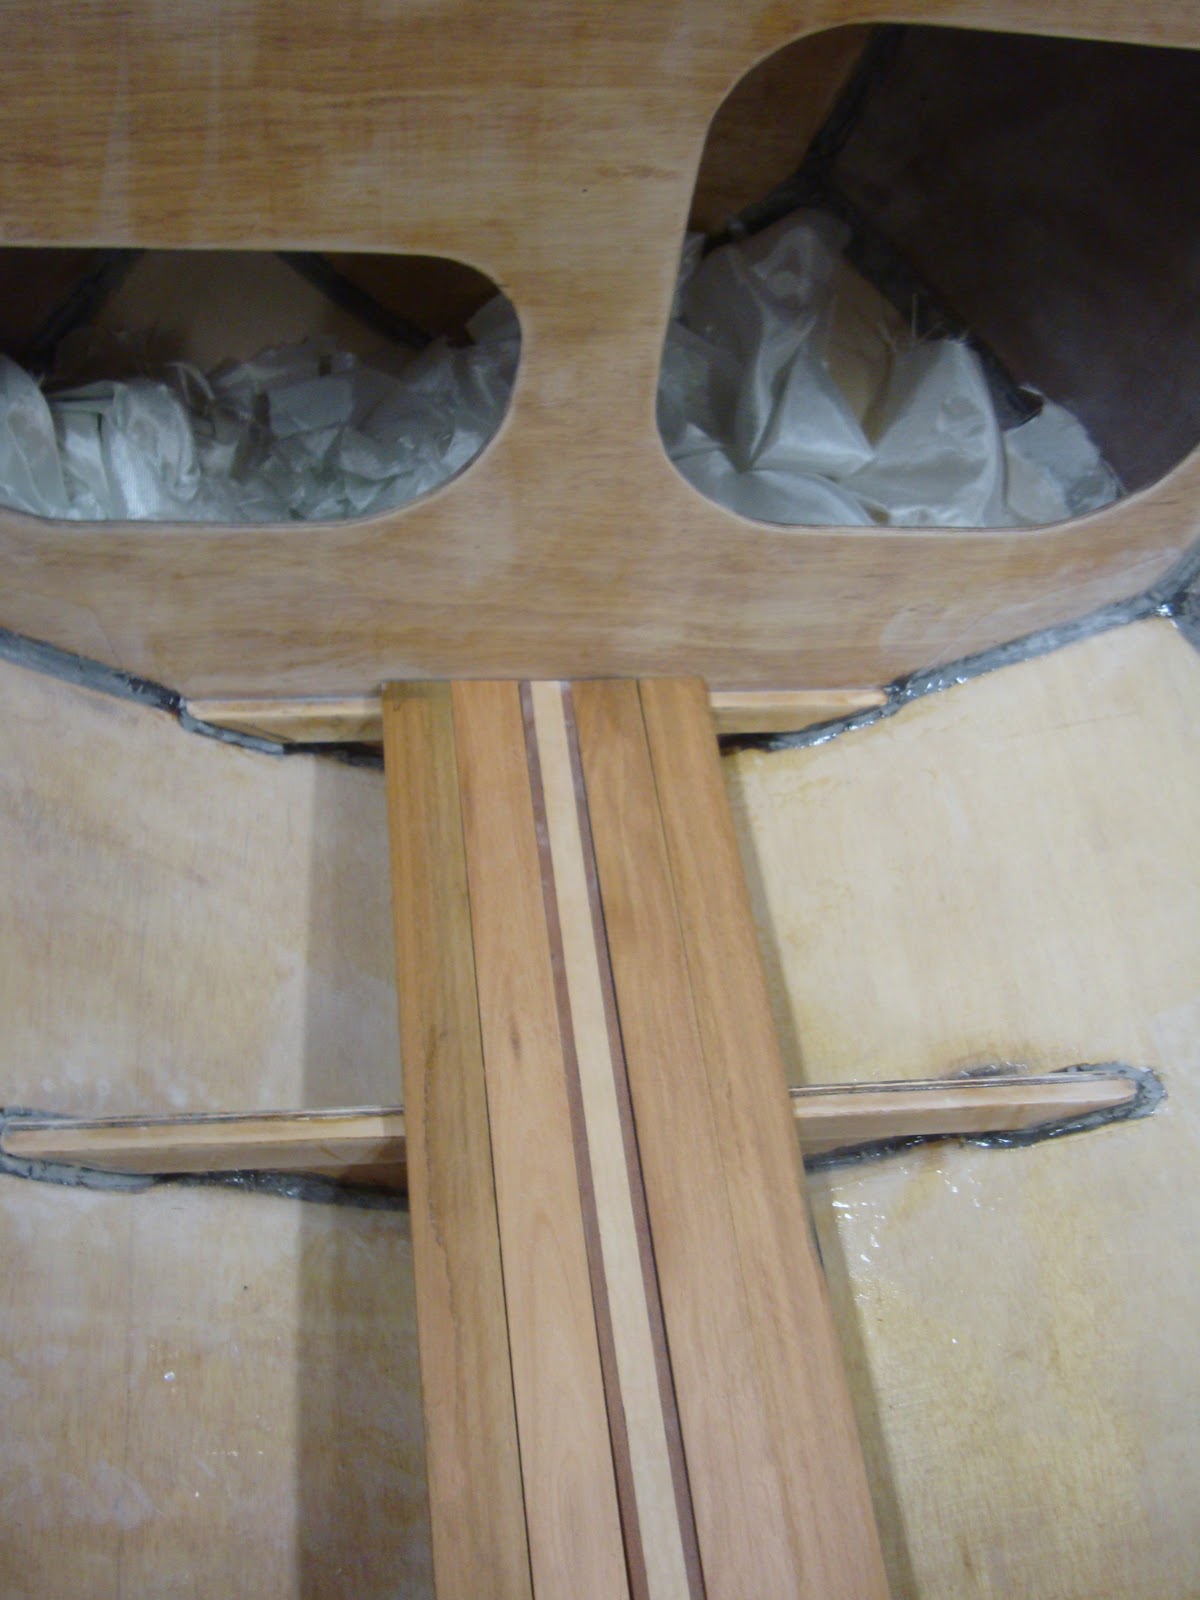
Anyway, the bottom line is that I'm moving on.  The next big job will be to fit up the cabin sole.  I got started on that last night managed to get one plank installed.  After that's all done, I'll be working on laying out and constructing hard points for various systems on the boat (battery box, electrical panel, radio, bilge pump, etc).  And I've still got a little bit of fiberglass work to do forward of bulkhead 2!!!  Can't forget that.  Then a little more sanding, and time for paint!

I picked up a couple of components for the electrical system already.  Holes for these will be cut soon.

The first board of the cabin sole has been installed!

Wednesday, October 12, 2011

Cleats, Clamps, Carlins, Carborundum, and Eucalyptus

I've spent some time sanding my newly-fiberglassed interior.  I am pleased to report that it is going pretty quickly.  I have spent around 3 hours sanding so far, and am just over half done.  Unfortunately, a lot of the sanding remaining consists of tight corners and small, hard to get to spaces.  Not fun, but I did a pretty good job with the glass work, so it isn't as bad as it could be.  And I am motivated to get it done, since after I'm done, there are a done of fun projects that should really advance the "doneness" of the boat quickly.  Motivation is good

So..weird story...I was out sanding away when suddenly I started smelling spaghetti inside my respirator.  Thinking that my sander or vacuum might be about to explode, I quickly shut down everything, pulled off my mask and...no spaghetti smell.  Mask back on, spaghetti.  I started sanding again and the smell went away.  A few minutes later, though...spaghetti.  Again, no smell outside the mask (except, of course, epoxy dust). More sanding, smell goes away.  Then it comes back again.   Strangest thing I've experienced whilst sanding.  I finally decided to interpret it as being time for dinner, so I hung up my sander, called it a night, went inside the house and ate...chicken.

Interlaced with sanding, I've tackled installing the framing that will support the cockpit deck and footwell.  In sharp contrast to all the epoxying that I've been doing recently, here I'm measuring, cutting, and installing wood, and as I do so, the boat looks different, so it feels like I'm actually building something.  Fun and highly rewarding. 
In the manual, it looks pretty straightforward to cut and install all of these cleats, carlins, and beams.  In actually doing it, you realize that there are a ton of compound angles everywhere.  Lot's of dry fitting and lots of measure twice, cut once, mesure once, cut twice, etc.  Also, just locating the cleats in the right places, particularly on the transom, front send of the footwell, and on the footwell sides was trickier than expected.  Lots and lots of dry-fitting is required to make sure everything is where it should be.  It goes slower than you expect, but it is awfully fun work, so no complaints.

Getting the angle of the hull.  The deck carlins are beveled to this angle

Set the sawblade to the right angle


Run it through and you get this!

Here's what it looks like in the boat

Next up, cover everything you see here in more timber

Once again, my clamp collection is deployed en masse
In the manual, the cleats on Bulkhead 8 are shown inside the cabin.  I didn't see any reason for that and figured that if they were installed inside the water-tight compartment, it'd save me some sanding and finishing.  So, that's what I did.


I was constantly dry fitting the footwell sides to check the placement of everything

There were lots of compound angles
The beams of the transom need to be notched out to receive the carlins coming in from Bulkhead 8.  The manual has these cut out after the beams have been glued.  Fellow PocketShip builder Sean came up with a nifty idea that I stole.  His idea was to pre-mark the cutout and the beam, and cut about halfway through the beam from the back side.  Then, glue in the piece, being careful not to get any glue on the bit you'll be removing.  Once everything is dry, simply pick up your saw and finish the cut.  Thus, the beam is aligned across the notch, and it doesn't take any swearing or chisel work to get it out.  Thanks for the great idea, Sean.
Before gluing the deck beams onto the transom, I pre-cut the notches into the back side where it is notched out to receive the carlins.  After it was glued down, I finished cutting it out.

Ready for a carlin

More cleats/carlins.  Notice that I've temporarily set the aft carlins in place...in the wrong spot.  They should be in the
next notch outboard

I've spent quite a long time at Martin Lumber, trying to select an appropriate wood for my cabin sole.  I wanted something hard and tough, with a nice, tight grain, and a mellow, luxurious colour to it.  I looked at teak (too expensive), mahogany (too soft), maple (too light in color), blood wood and paduak (both too dark),  cherry (grain wasn't what I was looking for), oak (too ubiquitous), etc, etc.  Finally, I settled on something called lyptus.  It's hard, heavy, millable, sustainable, has a beautiful, tight grain, and a gentle reddish color.  I did a little research on it, and it turns out that it is a plantation-grown eucalyptus hydrid.

I also wanted to add a little bit of flash to the inside of the cabin, so I decided to glue up a piece of figured maple between two strips of bloodwood to serve as an accent plank.  When finished, the figured maple has and awesome iridescent quality.  Add in the deep-red contrast of the bloodwood, and I think it'll look awesome.  Right now the plan it to run one of these accent strips down the middle.  I'll likely also run one more on each side farther from the centerline.  I'll be playing around with it as I lay the sole, and see what looks right.

I've taken a couple of scraps of the woods and experimented with a couple of different finishes.  High-gloss polyurethane or varnish are out...too garish.  I want a nice, soft, luxuriously satin finish.  Danish oil looks really good on the lyptus, but doesn't totally bring out the iridescence of the figured maple.  The the accent strips might end up getting a satin polyurethane, but I need to see how everything plays together.

I have yet to start putting down the sole.  I think I'm going to finish sanding the interior  and get the distasteful job out of the way first.  But gosh, it is going to be fun, so I'm having trouble holding off.   Also, I don't think I've explicitly mentioned this, but I haven't yet 'glassed the bilge panels forward of bulkhead 2.  It's been on my to-do list for a while, but the other projects have taken precedence largely because they're more rewarding.  But I will have to tackle that soon.  Anyway, more to come!
The makings of a nice sole.  The figured maple/bloodwood laminated piece is in the center, flanked on either side by lyptus.
Here's another view.  Notice the beautiful matte-grey-ish color of the sanded 'glass inside the hull

Saturday, October 1, 2011

Re-energised

It was just over a year ago that I took a trip to the Wooden Boat Festival in Port Townsend for the first time.  I went for a number of reasons, not the least of which is that I love wooden boats.  But, the number one reason I went?  To see a boat called PocketShip.

PocketShip at the 2010 Wooden Boat Festival in Pt. Townsend.  Alas, she didn't make it for the 2011 show.


I first became aware of the PocketShip design when I was on a wind tunnel test in Switzerland in May, 2010.  Another fella there, one of our wind tunnel model makers, saw a picture of my Redfish Spring Run kayak, then still under construction flash across my screensaver, and pretty soon we were talking boat building.   He that he and a buddy had built a Chesapeake Light Craft kayak, a Shearwater hybrid model, if I recall.  This guy, being wind tunnel model maker, is a top-flight craftsman.  So, the kayak that he helped on, was naturally immaculate.  It was even featured on CLC's web page.  He showed me some pictures at work, and that night I back to CLC's site to have a closer look at something else that had earlier caught my eye.  A small cruising sailboat.  Yes, PocketShip. 

I spent that night reading John C. Harris' excellent marketing materials on the CLC  website, and then proceeded to cruise the web for more information.  I found Dave Curtis' blog about his adventures building PocketShip, and read them over the next few days, completely enthralled.  Like so many other PocketShip builders, I was inspired by Dave's writing.  I think many of us think of him as "That PocketShip Guy, " a trailblazer, and by virtue of having already been there, something of a guru of Pocketship building.  Anyway, as I read Jai Guru Dave's blog, I was hooked.  I wanted to build this boat.  (Dave's blog also inspired me to write this blog.  Like so many sequels, it can never be as good as the original.) 

Pretty soon, back on the CLC website, the complete PocketShip kit was in my shopping cart.   I came this close to buying it.  But I held back.  The kit was a little expensive.  And I thought about Dave's remark about not being able to say you had truely built the boat if someone had cut out all the wood for you.  So, instead of hitting "Complete Order," I closed the window.  The next day, the kit was back in the cart.  But at that point, I did already have two boats under construction in my garage.  So I closed the window.  Next day, same thing.  Next, I tried scaling back...maybe just the plans.   Nope.  After many days of going back and forth and back and forth, I decided to  buy the manual and read it over before committing myself.
The manual was waiting for me when I got back from Switzerland.  I ripped open the package and read it cover to cover.  Twice.  Some things looked really fun, others puzzling, and others yet, torturous.  The absolute worst, most intimidating, scary part of the whole process was the fiberglassing and sanding of the interior.  All those little pieces of  'glass, all those edges, all those corners.  Yuck.  Still, there was no doubt I wanted to tackle this project, though I could not contemplate it until I finished the two kayaks in my garage, figured out how I was going to tow it, and figure out where I was going to put it when I was done (besides in the water whilst sailing, that is).

So, that's what lead up to my trip to Port Townsend three months later.  I had finished one of the two kayaks, and was making great progress on the second.  The towing problem was simple...Mopar makes a hitch for my car and it has plenty of towing capacity for PocketShip.  The third obstacle, where to store when I was done...well that could wait for another day.  A year later, I still don't know.  I'll figure it out.  Anyway, the major hurtles were mostly removed, and seeing PocketShip in person...well, the bottom line is that I was sold.

I didn't get to spend much time at the Wooden Boat Festival that year.  That day I woke up in the morning, packed a suitcase full of clothes, caught a ferry, checked out the show, saw PocketShip, caught another ferry, and by 7:00om that night was on board a 747 bound for the U.K. for a multi-week wind tunnel test.   If you look back to the very first post of this blog, you'll find out what happened next.

Why all this background?  And why now, a year after I started my build?  One reason, it shows the power of motivation.  I got all jazzed up after visiting Port Townsend and seeing PocketShip #1.  That launched me into a huge project, one that's had it's ups and downs, but so far has been greatly enjoyable. 

So, this year, off again I went to Port Townsend, in need of motivation.  I hadn't made much progress all summer.  This was partially due to my enjoyment of other summer activities, and partially due to my generally unhappiness with my fillets and my dread of sanding them.
Is there anything prettier than a schooner with tops'ls set? 
This time, I had more time to spend at the Festival.  I walked around, looked at the boats, listened to the talks, and met another PocketShip builder, Peggy, from Montana.  We swapped stories and commiserated a bit about the challenges of boatbuilding and the emotional rollercoasted that that goes along with it.  We are both in about the same spot in the build, so it was good to get somebody else's perspective on the whole thing.  I also met Larry Cheek, the builder of a fine Devlin Winter Wren, and the author of a great boatbuilding blog.  I've identified a lot with his struggles with perfectionism in boatbuilding, and admire his ability to let it go..  :-)  So, I definitely enjoyed talking to a range of people.

List everything wrong with this picture.  Oh, wait, there's nothing wrong with this picture.  Beautiful Pt. Townsend.  A pod of wooden kayaks.  And wooden boats galor!
In between the lectures, and the chats, and the boats, and eating some marginal food, I spent a lot of time look at fillets.  I think I looked at every fillet on every stitch and glue boat at the festival.  And you know what?  Mine aren't that bad.  At all.  Even the ones on the demo boats at the CLC booth weren't quite as nice as mine.  Seriously.  That was heartening.  Maybe instead of the major sanding job that I had anticipated, I really should just be considering a quick once-over.

So sure enough, just like the previous year, I left Port Townsend energized!  The next weekend, I suited up, went out to the garage and tackled those fillets.  It probably took longer than it needed to, and I probably sanded more than I needed to.  But, I finished.  So, I broke out the vacuum and cleaned out the interior and prepared to lay some fiberglass.

I didn't see any good way to 'glass the whole interior in one go.  Neglecting the fact that I wouldn't be able to get the seams as nice as I'd like, my arms just aren't ape-like enough to easily reach  all the way to the centre of the boat from outside the boat.  So, I settled on 'glassing half the hull at a time.  To try and keep the seams nice, I decided that the easiest thing to do would be to alternate between port and starboard for the glass in between each of the floors (I think the pictures below will illustrate what I mean).  That way I wouldn't have any overlapping glass when I was wetting out.
 
As I've done before, and as I highly recommend, I laid tape out on the borders of each area to be fiberglassed.  Then I laid the 'glass down inside, smoothed it so it lay flat, and trimmed it back to just outside the outside edge of the tape.  Once I did this for all the bays, I mixed up the epoxy and wet out the glass.  After everything was wet out, I squeegeed each section to get the excess epoxy off and then waited about two hours for things to tack up.  Then, I took my razor knife and trimmed the 'glass in along the inside edge of the tape and pulled the tape (on the fiberglass on it) up, leaving a nice clean edge on all of my freshly laid fiberglass. 

In all, it was a very long day, but I was thrilled to get it done.

Taping off the edges of the bays to be fiberglassed.

Laying down the 'glass in alternating bays

In order to keep dust and other contamination out as I crawled in and out of the boat with fresh epoxy, I donned these fashionable shoe  covers.

Here's the 'glass, wetted out.

Same thing as the last picture, but it took a really long time, so why not bask in it?

The next day, after the epoxy had dried, I set up to do the same thing in the other half of the boat.  Tape, cloth, epoxy, squeegee, wait, knife, peel, perfect.  I also coated the centerboard trunk with epoxy.

The remaining bays, ready to go

Wetted out.


Cutting and peeling back the tape and 'glass


The inside of the boat, fiberglassed!  Hooray.

The manual seems to imply that only one more coat of epoxy goes inside, but I did two more for the usual total of three.  Habits are hard to break.

So, that's it.  This was one of the projects that, even since before I began, I have dreaded, and now it is done.  Sanding all this was really intimidating too, but I did a really nice job on the 'glass work, and the edges and overlaps are neat and tidy.  So it shouldn't be too hard.  I'll alternate sanding with other boat projects over the next few weeks.

Speaking of the next projects on the boat, next up, I will be installing a variety of beams, cleats, and carlins on which the cockpit deck will eventually attach.  Then I'll start in on the cabin sole.  In direct contrast to the one I just finished, these are projects  that I have looked forward to ever since reading the manual the first time.  I'll get to cut some wood, glue stuff together, and generally do things that'll make the boat look more and more finished.  Hooray!

Friday, August 19, 2011

Its Great When One of My Plans Actually Works

True to the plan I had outlined in the last post, I laid out my collection of sanding contraptions, set a time to one hour, and attacked the fillets between bulkhead #8 and the transom.  I should take a picture of all of my sanding tools...in and attempt to make this tasteless job as easy as possible I really have amassed quite a collection. 

Back to the fillets...I went at them with various tools, but found that using my best fried, the random orbital sander, worked the best.  Of course, I was using it in a very abusive and incorrect way.  The rulebook of tool use says, "lay the sander flat against the surface, don't tilt it an just use the outer edge."  Well, that's not the way I used it.  Tough beans.

I used my detail sanding, drill-mounted grinding disk, and some good old hand sanding, and manages to take care of almost everything that the random orbital sander missed.  But there was one spot that nothing was really effective on.  So, I called in the big guns.  Dremel tools are awesome.  They're fast, they're light, and they'll cut through just about anything.  Unfortunately, the same characteristics that make them so powerful, also make them dangerous.  One little slip, or too much overexuberance and you're dealing with a monumentally unintended gash in your project.   Needless to say, when I fired up the Dremel, I was very, very careful.  And it paid off.  The trouble spot disappeared and I wasn't left with a hole in my hull.

With the sanding back there complete, the next step was to fiberglass the area.  To make things neater, I used a trick I learnt on the Pygmy kayak.  Run tape around the perimeter of the area to be 'glassed.  Lay out the 'glass and trim it so that it extends on to the tape.  Wet out the 'glass.  Let it sit for about 2 hours.  Take a sharp utility knife, and cut the 'glass along the inside edge of the tape, being careful no to cut into whatever is underneath the glass that you are cutting.  Peel up the tape, taking with it the rough edges of the 'glass.  This leave you with a nice, clean edge.  Combined with a good wet out technique, the finished product requires a minimum of sanding.

Masking off in preparation of fiberglassing

Fiberglass on the starboard side, ready to be wetted out.  The port side has already been done.
Sean, another Pocketship builder, mentioned that he had run fiberglass tape along the transom joints.  Liek me, he's planning on hanginga small outboard off the transom, and he figured that to be safe, he'd add som tape to really beef up that joint to handle the extra loads.  I'm of the opinion that it is probably unnecessary and overly conservative to do this.  So, naturally, I decided to do it too. 

Progress is still slow, but at least it is moving again.  And it is slow for all the right reasons, including:

Overnight kayaking trip to Hope Island


Backpacking trips to Toleak Point...

...and Marmot Pass

Fly fishing in Idaho

Evening kayak trips around Everett
 
And lots of other day hikes, bike rides, and the like.   And the great news it, summer ain't over yet! 


So, next up, it is time to move on to the next phases of my sand-for-an-hour-then-glass plan.  I have my stopwatch ready!

Thursday, August 4, 2011

Need a New Plan

I have found myself bogged down on my Pocketship project.  I'd like to attribute my current lack of progress to the nice weather we've been having here in the Pacific Northwest.  And it is true, I've spent a lot of time biking, hiking, kayaking, walking, backpacking, and generally not working on the boat.  But really, that isn't the reason that I haven't been making progress.  The reason is fear.
I went out to inspect my fillets, and decided that I did a pretty good job on them.  Then I started to sand them.  In sanding them, I found that there were a couple of places that I wanted to sand a little more, so that they'd look really good.  And then I found a few more places, and a few more.  The more I sanded, the more perfect I wanted it to be, and thus the more sanding it would require.  Thus, the more I did, the further I was from being done.  Finally, I stopped sanding, boggled by the amount of sanding left before me, afraid of the task ahead (I hate sanding) and devoid of the motivation require to perform it (I hate sanding).

Mind you, there really was/is very little cleanup that needs to be done to do a decent job.  The issue here is me wrestling with perfectionism.  There are two really good boatbuilding blogs that I've read that deal a lot with the role of perfectionism in boatbuilding.  One one side, there is Peter Gron, who built a Devlin Arctic Tern.  He embraced his perfectionism, indulged it even, and ended up with a beautiful boat.  After seven years.  Then there is Larry Cheek, who is almost done with a Devlin Winter Wren.  Larry tries to inject reasonableness into his work, fight the perfectionist urge, finish and move on.  I've learnt a lot, reading these guys' stories.  Where you draw the line will determine the final quality of your work, but it will also determine (based on your personality) how much you will enjoy your project. 

I've drawn the line in the wrong place.  I'm not enjoying this project right now.  I need to redraw the line and move on.  To move forward, I need to find a way to get back into the work.  I need a sense of progress, a reward, a victory.  In the immoral words of a large, transforming, robot dinosaur, "Me Grimlock need new strategy."

Here it is.  I am going to spend one hour, no more, no less, sanding the fillets in the aft watertight compartment.  I will then set down my sander and glass the bottom of the hull back there.  This will give me a victory, and renewed sense of progress.  The rest of the boat will follow suit.  30 minutes of sanding forward of bulkhead 1.  45 minutes of sanding between bulkheads 1 and 2.  Glass.  One hour of sanding the chines.  One hour sanding everything else forward of Floor 4.  One hour sanding everything else aft of Floor 4.  Glass. Finish.   Move on.

Having a plan, I feel re-energized already.  Now the question is when can I get started?  Not this week.  I had a visit with the doctor earlier this week that left me in stitches.  Laughing aside, the doctor put a few sutures in me that'll come out next week.  Until then, I can really risk banging them around or getting them dirty, so no boat until next week.  Hopefully, after that, though, I should be able to dive back into it.

Sunday, June 26, 2011

Making the Grade

There are several reasons the quality of my work on the boat can suffer.  Insufficient preparation is one, impatience another.  But the biggest offender is usually hunger and fatigue.  I'll be trying to get a big chunk of work done and will neglect to eat or start getting tired and that's where things get sloppy.  And that's what happened on my fillets.  I got started an hour before lunch, and consequently put off lunch until I was done four or five hours later.  Toward the end, I was really rushing to get done so that I could get some food in my belly.   Rushing is bad for quality, but who cares about quality when you are hungry?  And now I have to pay for that.

I was shooting for an A+ on my fillets.  The best ones were probably up to that standard.  The worst ones were maybe a C.  On average I'd say it worked out to a solid "B" effort.  What this means is that the next step, sanding the fillets, won't be tooooooo onerous, but bad enough.  And with the advent of nicer weather and the activities that go along with that (hiking, kayaking, bike riding), the prospect of having to spend a few hours sanding is bad enough that I've only spent maybe an hour working on the boat in the two weeks that have elapsed since I finished filleting.


Friday, June 10, 2011

Preparation. It's a Good Thing.

Earning an A in boat building (actually, a B+ is OK by me) takes several things.  Spending time in preparation, cleanup, a paying attention to details is what moves a boat to the next level.  Doing it right means sweating the details.  Sweating the details takes time.    And in life, lot's of things compete for time. 

On the bright side, when it comes to the "gluing" phase of stitch 'n glue construction, sweating the details can also save time sanding.  In the bizarre calculus of boatbuilding, three hours spent taping just to save an hour of sanding still somehow counts a saving time. .

I want to do a really nice job on my fillets.  I can do a pretty good job free hand, which is what I did on the rudder.  But, I wanted to take the fillets on the interior of boat to the next level.  As a result, most of my progresses since last report has been spent carefully masking all the soon-to-be-filleted seams on the boat.  And there are a lot of seams.  Done right, masking them off, applying the fillet, and then removing the tape yields a nice, sharp, clean, straight fillet.  Nice, sharp, clean, straight fillet look good and require less sanding.  And nice, sharp, clean, straight fillets are what I've decided I want in my boat. 


 With other things in life competing for my time, the multiple hours of taping (not to mention the multiple rolls of tape) constitute most of the progress I've made. 

I suppose I should also mention that I pulled all the stitches out.  Combined with removing the stitches from the cradle boat, there were a lot of stitches.  A lot.  And throughout the process of clipping and pulling hundreds of pieces of wire out of my hull, I couldn't get the famous Beatles lyric, "now they know how many holes it takes to fill the Albert Hall" out  of my head.  When I built me Pygmy Opsrey double kayak (which, by the way, had even MORE stitches!), that same phrase ran through my head as I pulled stitches.  I'm not really sure what to think about that.

The cradle boat is moving along too.  Just like big brother, it is all taped up and awaiting a couple of thickened epoxy fillets.  Maybe tomorrow...