Monday, December 27, 2010

The First Disaster

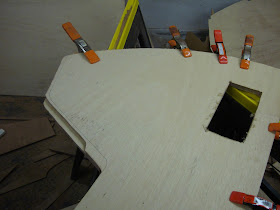
More and more boat parts emerged from plywood as my saw once again sliced through the thin sheets of okoume today.  Joining the growing pile of parts were the cabin deck halves, cockpit deck halves, cockpit sides, and many more parts.  Most of the cuts were made with my trusty circular saw.  For parts that are the same port and starboard, I'd stack two pieces of plywood and cut both parts at the same time. 

Cabin deck halves (both halves cut at the same time)

I also cut out the centerboard halves.  The centerboard will consist of two pieces of 3/8" plywood glued together to form a nice 3/4" thick centerboard. 

Centerboard halves, clamped together and freshly cut out.
 Since these pieces are identical, I naturally used the magic "stack 'em and cut 'em" trick to make sure they came out identical.  This lead to my first major disaster on PocketShip.  The centerboard halves were laid out pretty tightly on the piece of plywood. Since they were so near other parts, there wasn't much extra material surrounding the rough-cut bits o' plywood containing the centerboard halves.  When I stacked these two pieces of plywood together, I gave myself credit for doing a better job of aligning them than I had actually done.  The result was that a roughly 1"x6" piece of one half of the centerboard is missing. 

Disaster strikes!  One half of the centerboard is missing a little something.

One thing that I've learned in boatbuilding is that disaster WILL strike.  Something will get incorrectly cut, glued, sanded, not sanded, dropped, mixed (think epoxy), or delaminated.  And then you have to figure out how to undo, fix, or obfuscate your mistake.  And yes, it is always YOUR mistake.  Always.  The key is to not kick yourself too much or get down about it.  Keep a level head and think it through.  Having a sanguine Norwegian temperament helps.  There's always a way out.  Maybe a time intensive or expensive way out, but a way out nonetheless. 

Nine times out of ten, salvation comes in the form of the wood butcher's friend, epoxy.  This isn't one of those times, though I suppose one solution would be to whip up a big batch of thickened epoxy and glob it into where there should have been plywood.  But I'm not going to do that.  The possible solutions I've come up with so far are:

1.  Buy another sheet of 3/8" plywood and try again.  Disadvantage:  Cost.

2.  Cut a small bock of plywood roughly the shape of the whats missing and bond it it when the centerboard halves are glued together.  Disadvantage:  It'll take frustrating fiddling to get the piece to fit just right.

3.  The transom is cut out of 3/4" teak plywood.  The transom requires about 1/2 a sheet of plywood, leaving a fair bit of 3/4" plywood left over.  I am going to cut a couple of other parts (rudder cheeks and tabernacle) out of the remainder, but that'll still leave enough 3/4" to cut out a solid centerboard.  Forget about gluing two halves together!  Disadvantage #1:  The centerboard has a square cut out of it into which lead will be poured so that the board will actually go down into the water when it is lowered.  There is a rabbet in the center of the board cut around the perimeter of this hole so that the lead has something to hang on to.  Cutting this rabbet is really easy when you have to halves waiting to be joined.  Not so much fun when you have to excavate it from the 3/4 monolith.  But doable.  Disadvantage #2:  Cost.  That teak plywood is expensive.  In terms of cost per unit area, I could get that whole sheet of 3/8" plywood of the cost of a centerboard-sized piece of 3/4" teak.  On the other hand, I've already bought the 3/4" plywood, and I don't currently have any other plans for the wood that could make up my new centerboard.  So...

I'm undecided about which way to go.  I'll give it some thought, and in the meantime keep working on cutting out parts!

Friday, December 3, 2010

Jigsaws? Where we're goin', we don't need jigsaws.

My progress in laying out the final two dozen or so parts on the plywood has slowed considerably of late, largely due to Thanksgiving and other "hectic schedule." I did manage to take the pieces of plywood I've marked up so far out to the shop and cut out a bunch of parts. My newest ally in the sawdust wars was my circular saw.

I first tackled the cockpit/coaming side decks.  The manual says that a circular saw is good at cutting long gentle curves, so these parts seemed like good candidates.  So, I put a new carbide tipped blade on my saw and got to it.  Wow!  The cuts were remarkably accurate, fair and clean.  I cut the two partss separately instead of stacking two pieces of plywood and cutting them out at the same time.  After cutting them out, I put the two pieces back-to-back, et viola, as identical as can be.


Cutting out one of the cockpit side decks.

That worked so well at I decided to apply my circ' saw to the companionway and hood tops.  Those came out well too, and soon I was using that saw for any line on a part that was straight enough for the saw to handle.  I'd only switch to the jigsaw when quarters or corners got too tight.

Though I cut the rails separately I did stack a few other soon-to-be-identical parts before cutting, including the rudder sides and fore and aft keel sides.

Rudder halves, still clamped together after being cut out.  yes, I even used my circular saw on the straight bits of this.


 I spent maybe a total of two hours cutting out a bunch of parts.  I am looking forward to doing more, but thanks to work commitments, I probably won't able to get anything done for the next two-ish weeks.  Then it'll be close to Christmas, so realistically, it may be the New Year before much more gets done.

The parts are starting to pile up.

Thursday, November 25, 2010

Snowflakes and Sawdust Flies

To people in the nor'east and mid-west, this won't look like a lot of snow.  But it is.

We have had a bit of a cold snap around here of late.  Snow fell on Monday and it hasn't really gotten above freezing since.  This has had an unfortunate impact on my Pygmy kayak project, which is but two coats of varnish away from being done.  And it'll stay two coats of varnish away from being done until it warms up a little.

 So, instead of finishing that boat, I've been using my free time to keep making progress on PocketShip.  I'm still steadily transferring parts from patterns to plywood.  But, Tuesday night I could stand it no longer.  So, girded in long underwear, jigsaw in hand, I plunged out to the shop on the coldest night of the year to make some sawdust. 

This actually read 29F until I picked it up.

As you can see in the above photo, it was a little cold in the shop  (pay no attention to the date on the clock, the battery falls out constantly).  Brrr...  I started by laying out a beautifully marked sheet of 3/8 in plywood and set to work cutting out the bulkhead for the for'ard end of the cabin, Bulkhead #2.  Step 1 was to drill a hole big enough to get a jigsaw started in to cut out the smaller of the for'ard storage hatch openings.   I then cut this hatch opening, whilst experimenting with a couple of different jig saw blades/speeds. 

The first cut.  Or hole.  Whatever.

Lesson #1: The first part you cut you should not be one of the the most visible parts of the boat! A couple bad things could happen. You could, for example, drill a hole and find out that the drill bit you used hopelessly splintered the back side of the hole.  Or, you could find out that the jigsaw blade you first chose really likes splintering plywood too.  I'm just saying these things could happen, not that the happened to me, or anything.  Fortunately, after building a few boat, you learn trick to cover up mistakes.  Sanding, thickened epoxy, sanding, strategic trim pieces, sanding...pretty soon, no more mars!


By the way, another lesson, if it is below freezing in you shop, expect your jigsaw skills to be diminished.  You need blood in your fingers to use a jigsaw effectively.  Who knew?


Although I started cutting out Bulkhead #2, the first full piece to emerge from the plywood was the flange for one of the cockpit storage compartments.

My first PocketShip part! 

Bulkhead #2 followed  And, since I was on a roll, I also cut the floors for station 5 and the station 8 seatback frames.


One hour and twenty frozen extremities later...

By this point, I was feeling the cold in my finger and toes and decided it was time to quit.  I was so excited to abandon the shop for a nice, heated house.  Until I found out that in the time I was outside, my furnace conked out.  Don't worry, I got the furnace fixed the next day. But it was a little chilly that night.  Bugger.

Happy Thankgiving everyone!

Wednesday, November 17, 2010

Transfer Function

I've spent a couple of hours over the past few days transferring patterns to the plywood.  I still have quite a few parts to mark up, but am happy with the progress I'm making.  It seems like fast work, but oddly enough, takes longer than it seems.  I estimate that I've spent around 10 hours on it so far, and have only laid out the pieces on 3 sheets of the requisite 16 sheets of plywood.  This accounts for 26 of the 71 or so plywood parts in the boat.  Admittedly, those sheets of plywood have a large number of parts each, and some of the most complex parts in the boat (like the dreaded Bulkhead 7), so I am farther along than the numbers suggest. 
My biggest, and perhaps only, gripe about the full size patterns is that most of the symmetric parts (like the bulkheads) only contain one half of the part.  So, you have the mark half the part and the centerline, flip the pattern over, line up the centerlines and then mark the second half.  This creates chaos in two ways.  First, it makes it a little hard to make sure you've got the part laid out in the right spot on the plywood so that it doesn't overlap where other parts should be.  Second, you really have to be careful aligning the centerlines or else you'll end up with a funny shaped part.  So far, this hasn't introduced any errors that I'm aware of, but has forced me to spend a little extra time making sure everything is just right.  Don't get me wrong, using these full sized templates is quite simple.  But I'd have gladly paid the extra cost for the paper and ink required to print out full templates for the symmetric parts.

Friday, November 12, 2010

The Adventure Begins!!!!!!

Today, I commenced work on my Pocketship!!!  With the varnish flowing on the Pygmy kayak, I decided that I could do some cleanup in the shop, buy some plywood, and get started on the sailboat. 

I bought a bunch of plywood in the morning.  I didn't buy it all yet, just enough to get started.  I haven't bought the six sheets of 1/4" for the bottoms and sides yet, or the 3/4" for the transom.  However, the transom situation will soon be resolved as a have a nice piece of teak plywood on order.  Sapele was available, but, strangely enough, the teak was less expensive.  I think it'll look pretty nice!


Cleaning up the shop took most of the day. But by the early evening, I wrapped it up, moved a couple of pieces of plywood inside the house (figured I could mark 'em there as well as anywhere), threw another coat of varnish on the 'yak, and got to work.


Step 1, put on appropriate music.  Wanting to get started out on the right foot, I dug out all the sailing songs I could find, lead off by "Full Sail" by the Beach Boys...an extraordinarily pretty song.  Two more Beach Boys songs on the list, the bluesy "Sail On, Sailor", and the classic "Sloop John B." 

I followed the method described in the manual to mark the parts: lay out the pattern, prick the lines with an awl, pull the pattern up, and play connect the dots on the plywood.


I managed to get the first piece of plywood marked up tonight.  My plan is to mark all the wood I have now before letting the sawdust fly.  I have to admit though, having one board marked, I feel a strong urge to change those plans and start cutting right away!  We'll see what happens.


One more note.  I did some shopping for material for spars today whilst I was at the hardware store.  I can get exactly was I need in either spruce or fir.  The fir is about 1/5 the cost of the spruce.  As far as I am concerned, spruce is absolutely the best material for spars out there.  But, given the price differential, I'll probably go with fir.  The manual strongly implies that it is impossible to get wood suitable for a mast in 16' lengths.  Poor Easterners.  Here in the NW,  the biggest problem is deciding which species you want your clear, straight, air-dried, vertical grained sixteen footers in.

Monday, October 25, 2010

I Think I Already Said "Getting Closer," But...

...it's true.  I have made substantial progress on the kayak and will be ready to start the endless process of sanding and finishing this week.  PocketShip construction could commence in as little as two weeks (three is more likely). 

I have not been idle on the PocketShip front, though.  I priced out everything in CLC's PocketShip Sailing Hardware Package at Fisheries Supply.  I found that I could beat CLC's price by about $100.  With state sales tax added into Fisheries' price, and accounting for shipping from CLC, the total cost is nearly identical.  Of course, if I license the boat, I'll have to pay sales tax on everything that I hadn't already paid sales tax on.  Plus, Fisheries Supply will probably have a sale before I need any of the hardware, so I'll wait until it goes on sale and see how that changes the picture.

The price on CLC's epoxy package can't be beat, though.  And I tried EVERYWHERE.  So, I'll be ordering that from them.  As soon too, if my build is really going to start in just a few weeks.

Other things I have been pondering...depth sounders, compasses, dust collection systems (my shop vac bit the epoxy-laced dust this weekend), and whether there are any nautical superstitions about the use of black walnut in boat construction.  I can think of some bits of PocketShip that would look great with walnut trim, but I've heard folks say that it is considered unlucky in boats.  Of course, I've also heardof lots of folks who haven't heard that one.  The jury is still out. 

Saturday, October 16, 2010

Getting Closer

Yesterday I had that "one good day" of boatbuilding I wanted and made some great progress on the Pygmy.  Soon she'll be done and Pocketship construction will begin. 

One of the advantages of having built a few boats before is that you find that you have a lot of clamps.


I have on the order of 50 clamps in use here....and what's worse, if I had 20 more, I could have used them all!  These clamps, and possible many more will be put to work on PocketShip

Also yesterday, I made my first PocketShip-specific purchase: a cheap pair of welding gloves to use when pouring the lead into the keel. 

This morning is too cold to work on the boat, so I'm going to go hiking.  I've got measures that I can take to enable cold-weather boatbuilding, but I'm not quite ready to break them out.  I'll probably be using all the cold weather tricks this winter once I start on PocketShip.

Friday, October 8, 2010

Starting a Web Log and Catching Up

I have decided to undertake the construction of a PocketShip, designed by Mr. John C. Harris of Chesapeake Light Craft.  This boat is a 15' pocket cruiser.  I started logging my activity in a journal, but inspired by other PocketShip builders, most notably Dave Curtis, I have decided to "blog" about it.  To catch the blog up to date, here are my journal entries thus far: 

20 September, 2010 – Farnborough, England - Today, I ordered the plans for PocketShip, a John C. Harris designed 15’ sloop-rigged pocket cruiser from CLC boats.  I have been on a wind tunnel test for the past week, and have been re-reading Dave Curtis’ blog about his building of a PocketShip in my spare time, and finally decided to take the plunge.  Taking a cue from Dave Curtis, I’ve decided to build from plans rather than the kit.  As he argued, how can you claim to have built a boat if someone else cut all the wood?  That, and it should save a few dollars.  Plus, I can stagger the cost…buying materials as I need them.  So, from scratch it is.      My plan is to finish my Pygmy Osprey double kayak and clean up the garage before actually starting.  After that, I plan to prepare any sub-assemblies, scarf together the plywood, cut out the parts, pre-fiberglass as much as possible and build the spars this winter.   Then, the car gets kicked out of the garage and a boat will take shape in its place.  Let’s see how it goes!

25 September, 2010 – I arrived back home from England two nights ago.  The PocketShip plans arrived today.  I had my mail on hold whilst I was away, and though it was supposed to be delivered today, it didn’t come.  I was so anxious to get the plans that I drove down to the post office to collect my mail.   I have spent a few minutes pouring over the drawings, but am afraid to unroll the templates just yet, lest they get too badly crinkled.  I will try to stop at Martin Lumber tomorrow after work to price plywood, and stop by Fiberglass Mart to see what they can do on prices there.  CLC offers an epoxy package that may be the cheaper way to go, but I’ll price everything out first.
I’ve been thinking through details since ordering the plans.  One big thing is painting.  I’d like to have enough bright finish to declare in no uncertain terms that this is a wooden boat.  One Idea is to paint the hull (up to the rubrail) green (or red), and then bright finish everything above that, with some strategic green (or red) on the toerails and other trim pieces.   Another idea is to do green and white (like the prototype’s blue and white), but then add wood trim and decking in and around the cockpit.  Ideas, ideas…
I’ve also been re-reading the manual since I got hone, and getting a better idea of what all I can get done before starting final assembly.  I might need to make a list to plan things out more.
In the meantime, I have to start making progress on my Pygmy kayak again.  I need to finish sanding the hull (or at least sand the shear) and then I can fiberglass the deck.  I’ve got to get that boat done and out of the shop before starting on PocketShip. 

28 September, 2010 – I stopped at Martin Lumber today to investigate plywood prices.  For Marine Grade AB Okoume plywood, their prices were $33 for ¼”, $49.50 for 3/8” and $99 for ¾”.  Thus, the plywood for Pocketship will run $650-$700.  A far cry from the “wood-parts only” kit offered by CLC for $2400.  Of course, that kit comes with all the parts cut out, but for $1700, I’ll cut my own, thanks.
 I also spent some time of Fishery Supply’s web site to scope out hardware.  My conclusion is that I can easily beat CLC’s “hardware package” price by doing my own shopping,  but it’ll take actually going to the store to make sure I’m getting the right stuff…web-ordering won’t cut it.  So, that’s a trip for another day.
1 October, 2010 –  I find myself itching to start cutting wood on PocketShip.   Until I get that Pygmy Double out of the shop, though, there just isn’t room.  So, sander in hand, I’m headed out there now to make some progress!


8 October, 2010 –  I have been making progress on the Pygmy.  I've been trying to put in 1.5 hours per night a couple nights a week, and have been moving along pretty good that way.  I need a good, free Saturday to sand a bunch or stuff and glue a bunch of stuff.  That would really speed things along.  But not this weekend: other plans. 
I've been reading PocketShip blogs, shopping (not buying, yet) for supplies and hardware, and dreaming about PocketShip during my lunch hour.  Can't wait to get started.  Some questions are already coming to mind.  For example, when do the outsides of the topsides panels fore and aft of the cabin get 'glassed.  When you glass the cabin top, the manual says that it is a good time to 'glass the topsides panels to the sides of the cabin, but to wait until the boat is rolled to 'glass fore and aft of there.  But I can't figure out exactly when that is is.  Seems like it'd have to be before installing the rubrails, which means before rolling the boat, which contradicts the manual.  The photos in the manual seem to support my theory too, again in contradiction to the text.  Sigh.
I have put all that reading of Pocketship plans, blogs, etc to good use on the Pygmy!  Somewhere in all that read, John Harris highly recommends hooking up a vacuum to your random orbital sander.  I've done this while sanding stuff on the Pygmy, and what a difference it makes!   I also took a cue from Dave Curtis and ran my headphones inside my ear protection so I could listen to music whilst sanding.  Aaah...small luxuries.